
- Updated on
Realistic Materials in AI Renders: Concrete, Timber, Glass
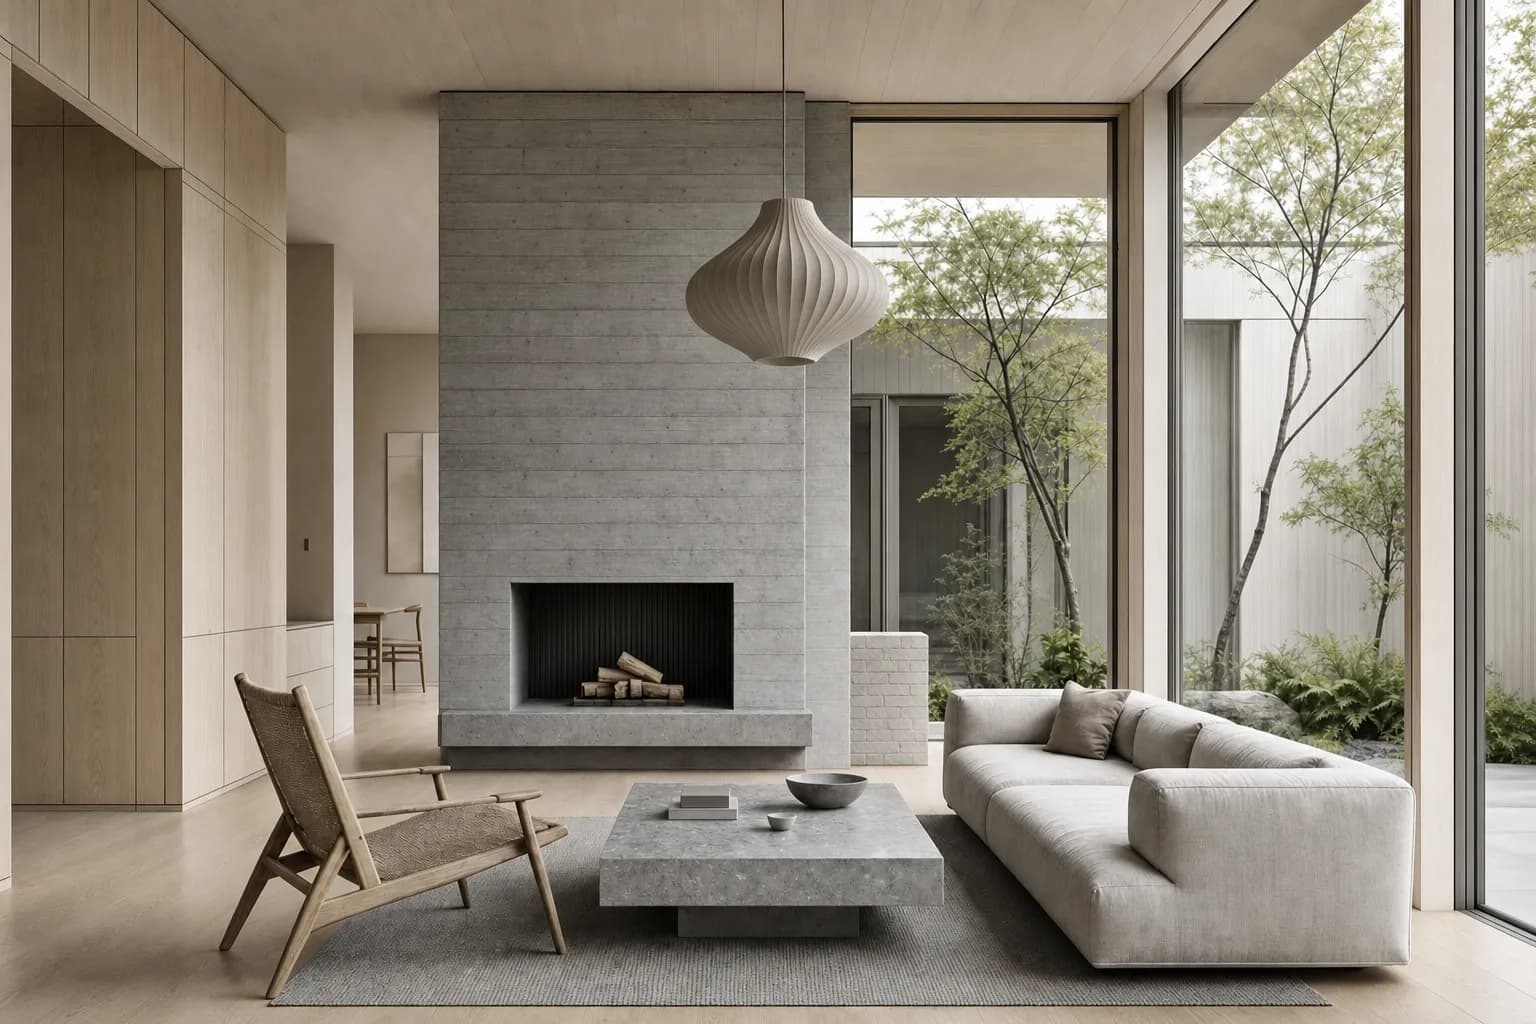
Realistic materials in AI renders need more than a material name. Define the surface, finish, scale, joints, edges, variation, and response to light. Use a source image when the building should remain recognizable. Then change one main material at a time. Review the whole image before inspecting detail crops. Generated surfaces can look convincing while crossing boundaries, breaking bonds, moving mullions, or repeating texture. Keep the model and physical samples beside the render. Use the image to discuss visual direction. Use specifications, product data, samples, and mockups for approval.
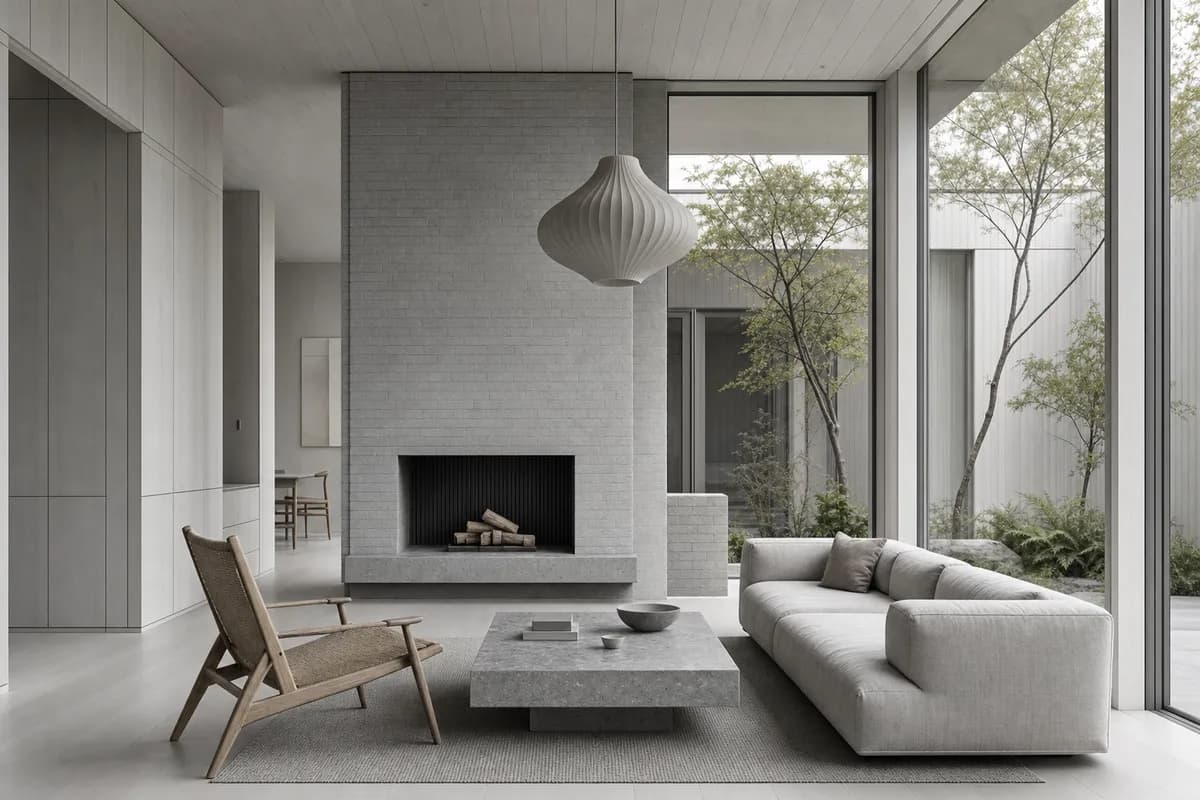 Synthetic source
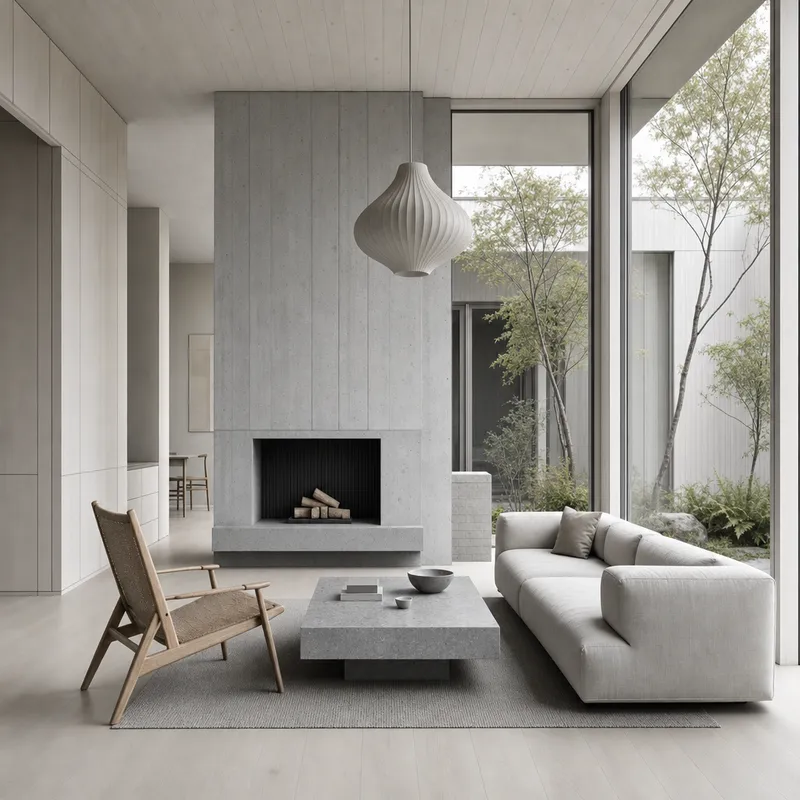 Material study
What makes a rendered material believable?
A believable material follows the building. It sits on the intended surface, turns corners, meets openings, and keeps a plausible scale. Texture alone is not enough.
Use seven checks:
- Assignment: the material stays on the named wall, floor, frame, or roof.
- Finish: highlights match matte, honed, satin, oiled, or polished surfaces.
- Scale: boards, bricks, tiles, and slabs fit the architecture.
- Joints: bonds, panel lines, seams, and shadow gaps follow construction logic.
- Edges: corners, reveals, sills, and junctions remain clear.
- Variation: grain, pores, color, and weathering avoid flat repetition.
- Light response: reflection, shadow, and color suit the lighting condition.
| Question | Useful direction | Reject when |
|---|---|---|
| Where does it go? | Name the exact wall, floor, frame, roof, or joinery surface | The finish spills onto furniture, openings, or adjacent construction |
| How large is it? | State board width, brick bond, slab scale, or panel rhythm | Units change size across one plane or ignore corners |
| How does it meet an edge? | Describe flush joints, shadow gaps, reveals, seams, or mortar | Texture wraps over an opening without a believable junction |
| How does it catch light? | Name broad matte highlights, restrained reflection, or honed sheen | Every surface carries the same sharp gloss |
This is an architect's briefing method. It is not a comparative model test.
Should you use Create, Enhance, or Edit for materials?
Choose the mode from the starting point and the size of the change.
| Starting point | Use | Main boundary |
|---|---|---|
| No fixed building or room | Create for an open material and atmosphere study | Composition, openings, and furniture remain open to generation |
| A resolved CAD or 3D view | Enhance to restyle the whole source while preserving its visible view | Preservation is an instruction, not a mathematical geometry lock |
| One surface in an existing Render | Edit to mark and name the bounded material region | Generative boundaries are not pixel-perfect material layers |
Enhance fits a full source-led material pass. Edit fits a later correction to one or more named regions. The Edit mode guide explains Rectangle, Brush, Eraser, region names, and prompt requirements.
If the camera and proportions matter, prepare the view with the screenshot-to-render workflow. Use Create only when the visible design can remain open.
How do you write a complete material brief?
Use one consistent order:
Location + material + finish + unit scale + joints or edges + variation + light response + protected surfaces
The location comes first. It prevents a good texture from landing on the wrong surface. Protected surfaces come last. They define what should not change.
Complete Materials field
Copy the full brief, then adjust one variable at a time.
Prompt
Fireplace wall: matte board-formed concrete with restrained vertical grain, full-height pours, regular panel joints, subtle pores, and clean reveals. Floor and joinery: pale quarter-sawn oak with a clear matte oil, narrow boards, aligned grain, and consistent shadow gaps. Glazing: clear neutral glass with slim dark frames, visible interior depth, and restrained courtyard reflections. Small masonry return: pale handmade brick in a regular running bond with flush warm-grey mortar. Remaining walls: warm off-white lime-wash with low sheen. Keep furniture, textiles, and black metal accents unchanged.
This field can support related studies across one Project. The view instruction should stay narrower. It names the source and the one decision under review.
Source-led material instruction
Copy the full brief, then adjust one variable at a time.
Prompt
Keep the source camera, crop, room geometry, fireplace opening, glazing, furniture layout, and visible proportions unchanged. Apply the accepted Materials field to the room. Make joints, grain direction, frame depth, corners, and material boundaries readable. Use neutral overcast daylight for color review. Do not add furniture, move openings, change the pendant, or alter the courtyard.
The architecture render prompt guide covers subject, context, camera, activity, and constraints around this material layer.
What does a controlled material study look like?
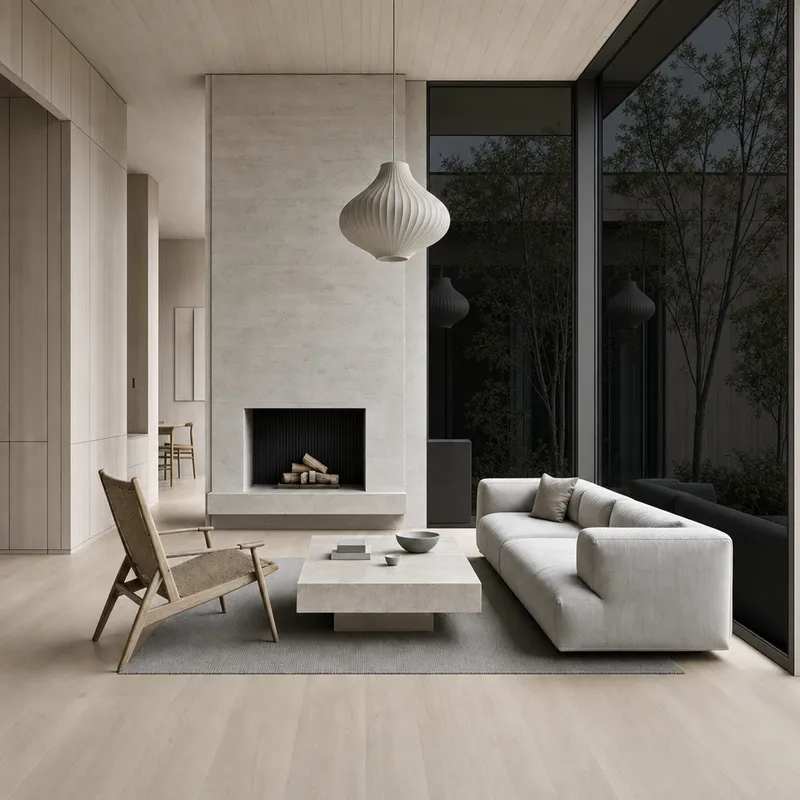
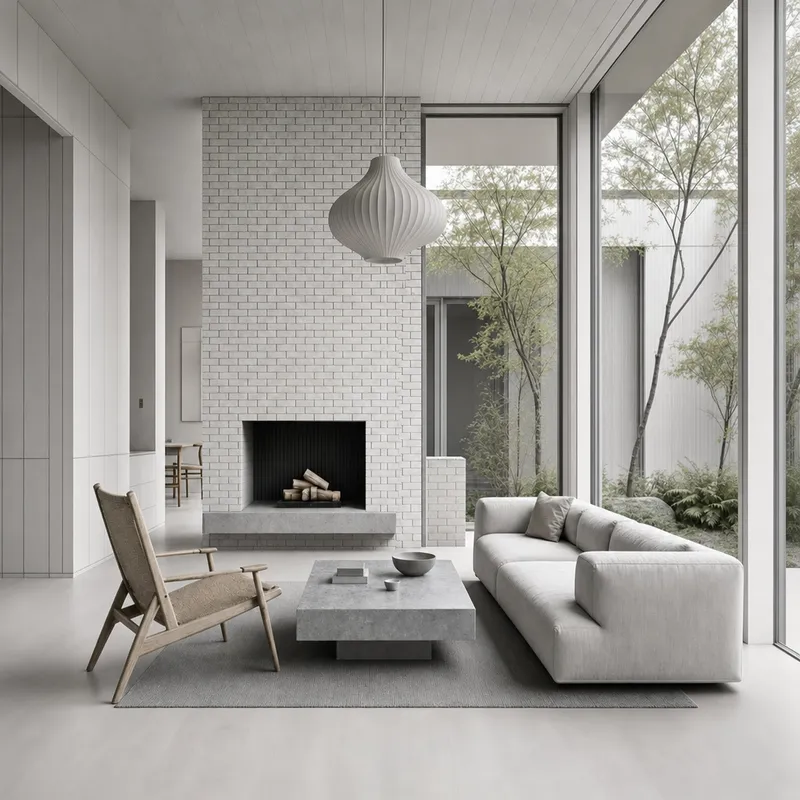
The visual study in this guide starts with one synthetic neutral model view. Each material direction derives from that same source through image editing. The camera, openings, fireplace, furniture, and courtyard remain the review anchors.
Synthetic sourceConcreteChoose a material, then drag the seam. Every option belongs to one editorial image lineage.
The public render-retention method explains the stricter test needed before making performance claims.
Source to material study
Test one material direction on your own scene.
How do you render believable concrete?
Concrete needs a forming and finishing idea. "Concrete wall" leaves too much open. State whether it is cast, precast, polished, honed, board-formed, or exposed aggregate.
For board-formed concrete, describe grain direction and panel rhythm. Add form ties only when the design uses them. Keep pores, stains, and cracks restrained unless weathering is part of the brief.
The American Concrete Institute guide to architectural concrete connects visible appearance with materials, forming, placing, curing, and finishing. A render cannot replace those decisions.
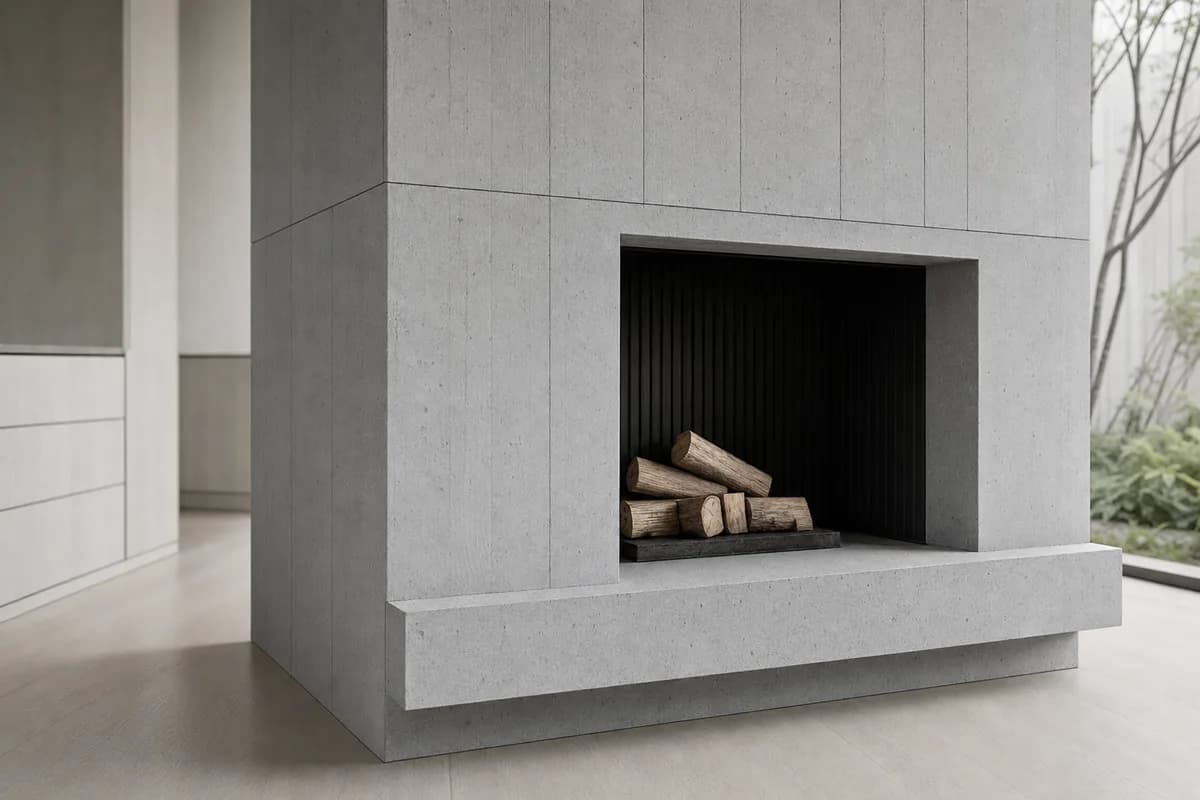
Concrete correction
Copy the full brief, then adjust one variable at a time.
Prompt
Keep the fireplace wall, opening, room geometry, and camera unchanged. Replace only the fireplace finish with matte board-formed concrete. Use restrained vertical grain, regular full-height panel joints, subtle pores, and a clean reveal around the opening. Keep the tone neutral grey under soft side light. No random cracks, heavy stains, glossy seal, or texture on adjacent walls.
How do you render natural timber?
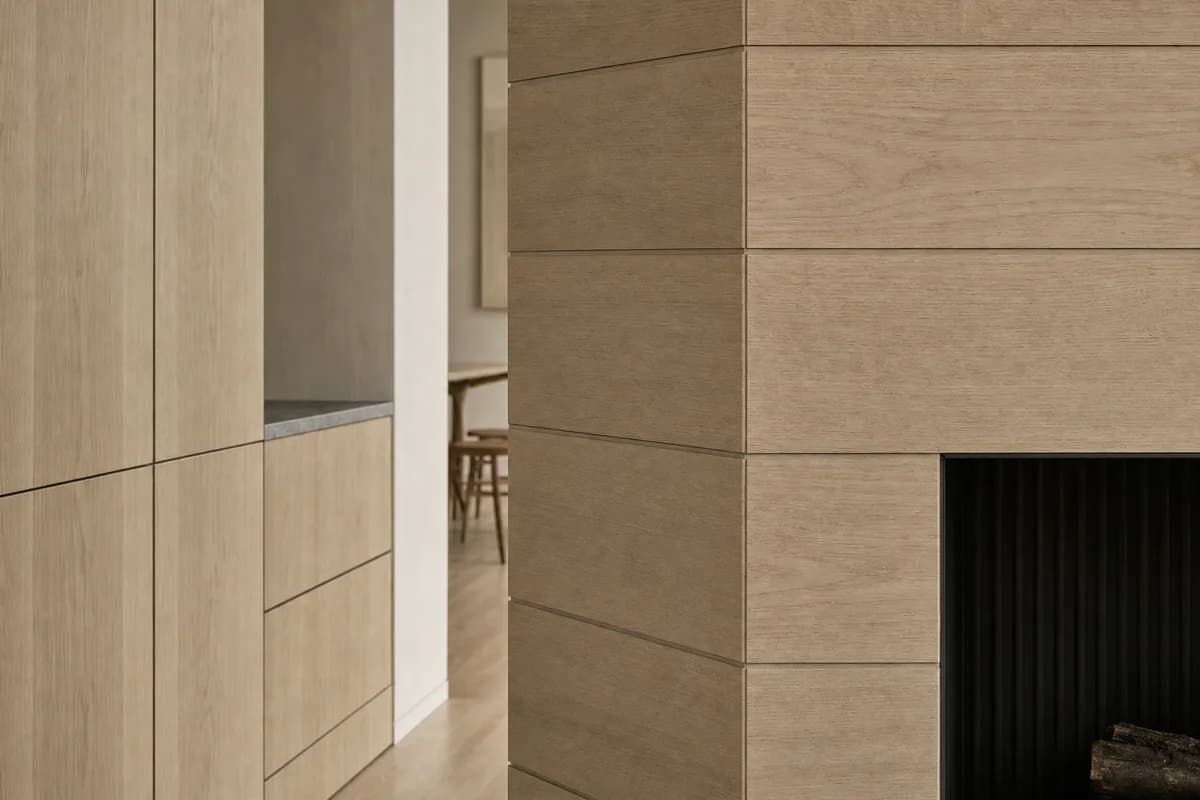
Name the species before the color. Then state the cut, board direction, width, joint, and coating.
"Pale quarter-sawn oak with a matte oil" is useful. "Warm wood" is not. Keep grain aligned with each board and joinery face. Reject swirls that cross several pieces.
WoodWorks guidance on timber appearance shows why appearance expectations need direct specification. Its structural timber classifications do not define this room's oak finish. Use project samples for that decision.
Timber correction
Copy the full brief, then adjust one variable at a time.
Prompt
Keep the wall geometry, fireplace opening, joinery, room layout, and camera unchanged. Apply pale quarter-sawn oak boards to the named wall only. Use wide horizontal wall boards, aligned grain, consistent shadow gaps, slight natural variation, and a clear matte oil. Keep highlights broad and restrained. No orange cast, sharp plastic gloss, oversized knots, or grain crossing board joints.
How do you render glass and reflections?
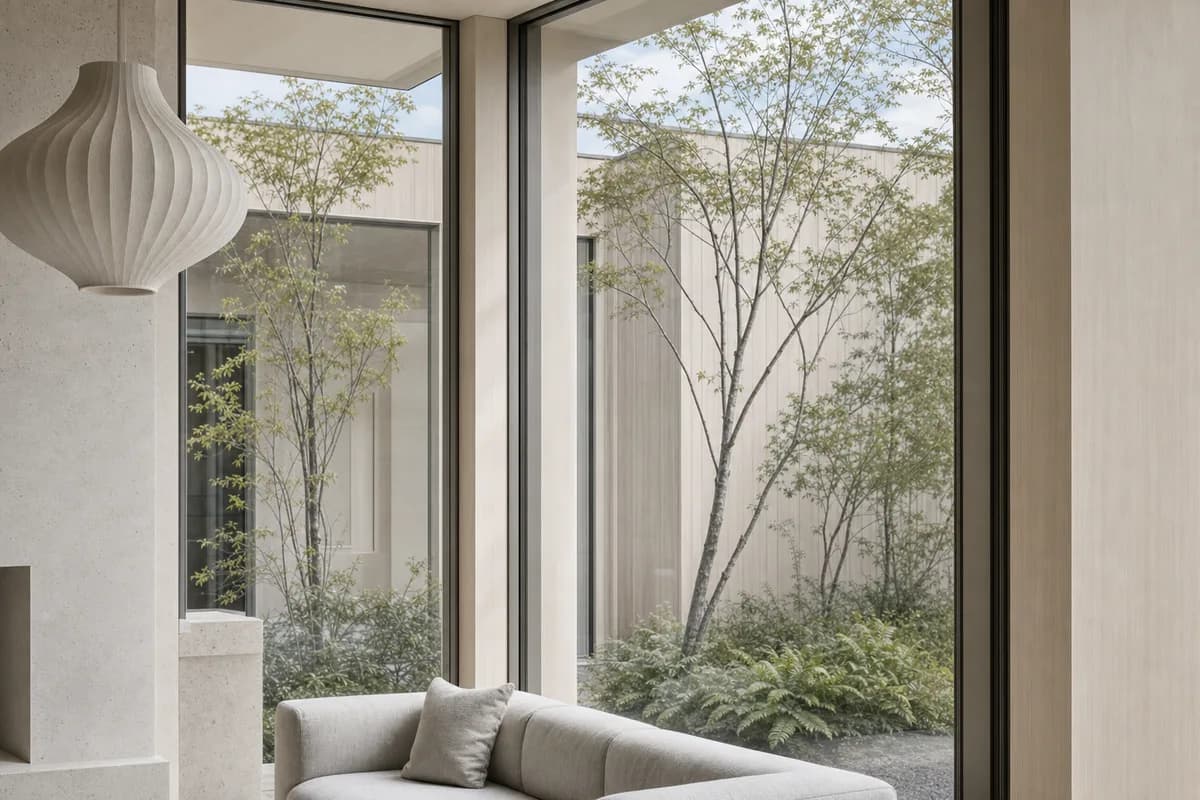
Glass should show transmission and reflection. Pure transparency can erase the facade plane. A dark mirror can hide the interior and flatten the frame.
Describe the intended balance. Try "clear neutral glazing with restrained sky and tree reflections." Name any tint. State whether the interior should remain visible.
Visible light transmission and reflectance are separate properties. Guardian Glass defines both terms for architectural products. Generated appearance does not prove either value.
Glazing correction
Copy the full brief, then adjust one variable at a time.
Prompt
Keep every opening, mullion, frame, sill, camera, and interior surface unchanged. Adjust only the glazing appearance. Use clear neutral glass with visible room depth, restrained courtyard and sky reflections, slim matte dark frames, and readable glass edges. Reduce exterior reflection enough to retain the interior. No mirror-black panels, doubled mullions, new divisions, or blue tint.
Mullions and narrow frames need close checking. Compare their count, spacing, and depth with the source.
How do you render brick and stone?
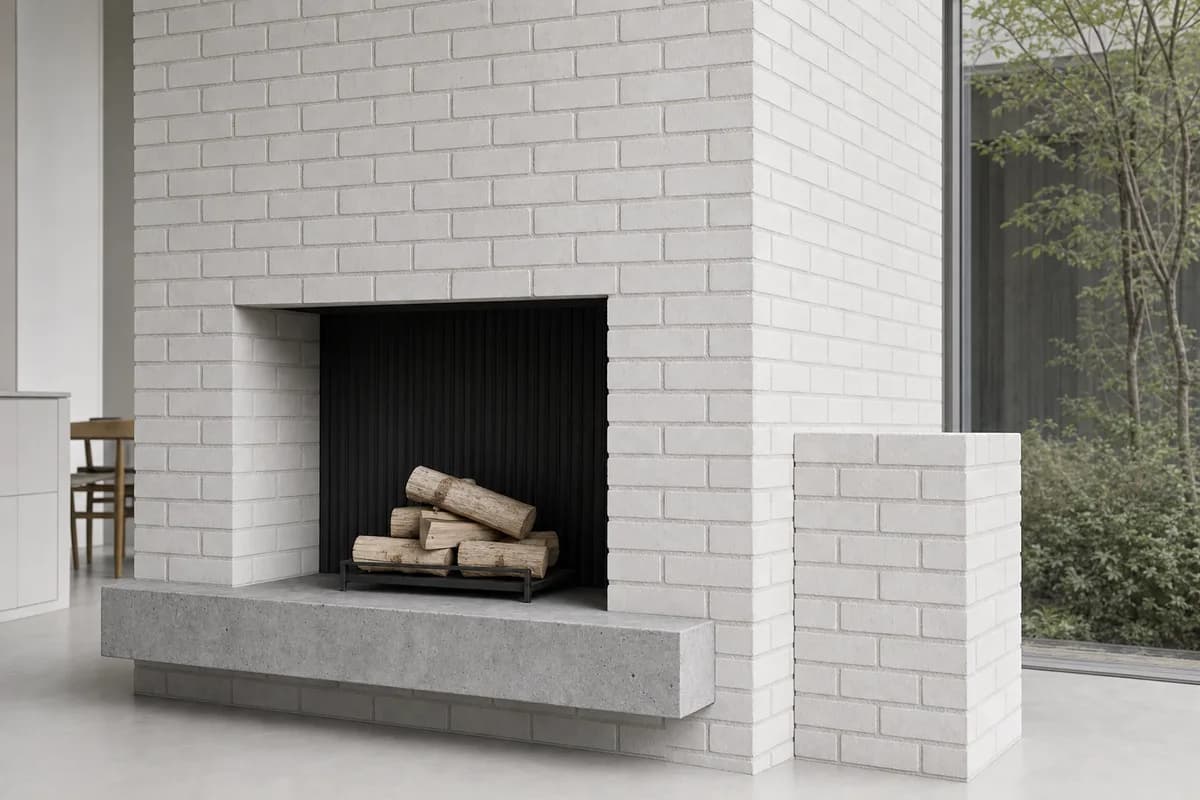
Brick needs unit size, bond, mortar color, and joint profile. Those choices control scale and shadow. "Pale brick" alone may produce random courses.
The Brick Industry Association guide to bonds and patterns shows how bond, color, texture, and mortar treatment shape a wall's appearance. Keep the generated bond regular. Count units around important openings.
For stone, name the stone family, unit scale, cut, finish, and joint width. Separate monolithic slabs from coursed masonry. Avoid mixed scales unless the detail calls for them.
Brick correction
Copy the full brief, then adjust one variable at a time.
Prompt
Keep the fireplace wall, opening, corner, room geometry, and camera unchanged. Apply pale handmade brick in a regular running bond. Continue the bond around the corner. Use believable unit scale, flush warm-grey mortar, consistent joint width, and restrained edge variation. No tiny repeating texture, broken courses, random bond changes, or brick on adjacent walls.
The AI exterior rendering guide applies the same checks to facade corners, openings, weather, and ground contact.
Prompt library · 17 promptsMaterialsBrowse prompts

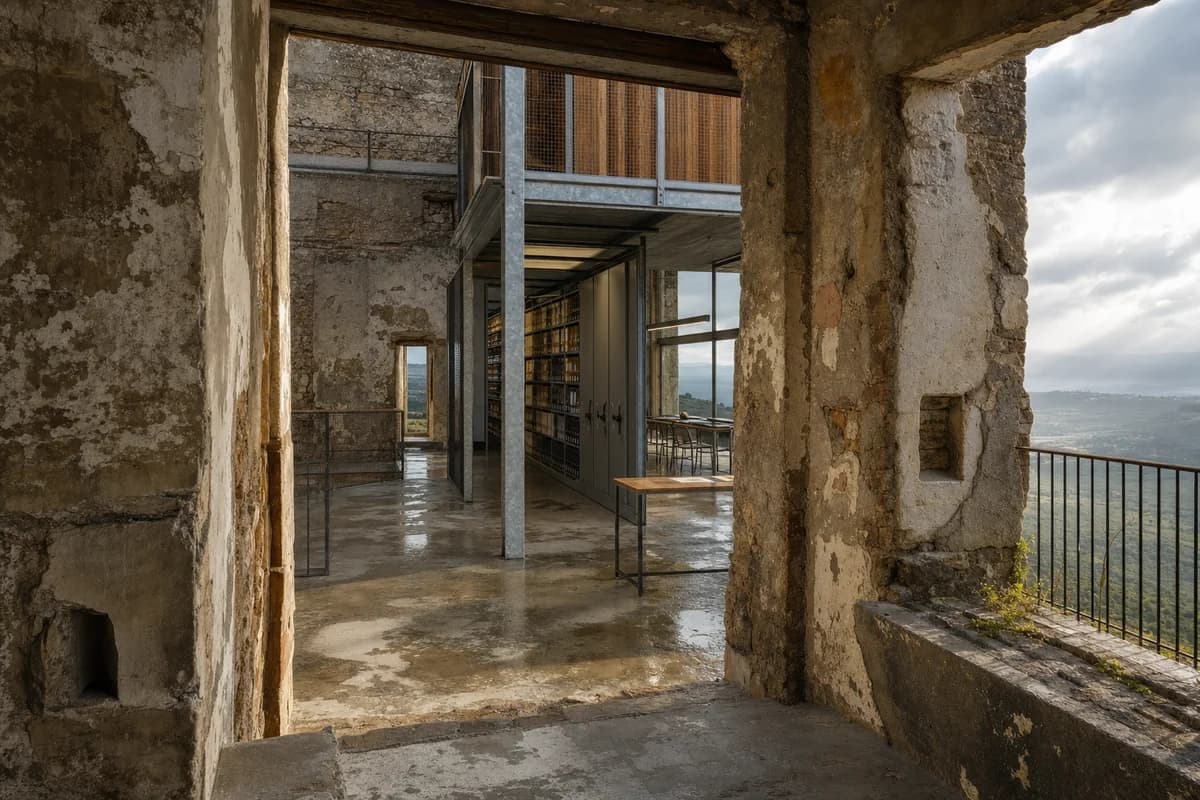
Can you use a product photo or sample as a reference?
A material photo can guide color, grain, finish, and general visual character. It cannot transfer certified performance or guarantee an exact product match.
Keep each image role clear:
| Image role | Useful for | Does not prove |
|---|---|---|
| Source image | The camera, visible architecture, and bounded scene for Enhance or Edit | Hidden geometry, BIM data, or exact dimensions |
| Composer reference image | Visual context such as grain, finish, palette, and atmosphere | A measured material value or guaranteed product match |
| Project reference image | Generating a draft Composition for the five Project fields | A direct render input or fixed material sample |
| Physical sample or mockup | Built color, texture, edge, joint, sheen, and approval | How every future lighting condition will photograph |
Crop the sample tightly. Remove labels when they are not part of the task. Tell the brief which surface should use the reference and which surfaces must stay unchanged.
How should light expose the material?
Use neutral diffuse light for broad color. Use angled light for relief, joints, and grain. Check reflective materials from a camera that includes something plausible to reflect.
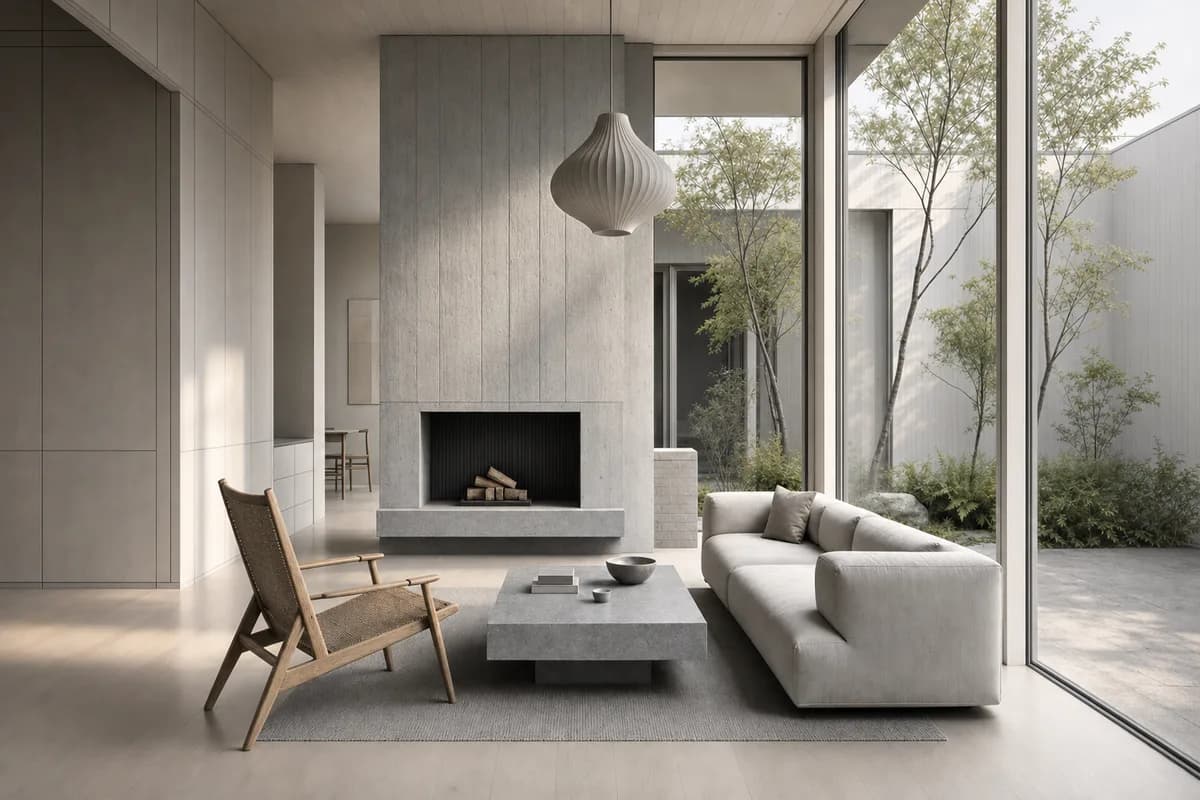
Do not approve a palette from one dramatic image. Keep a neutral daylight version beside the presentation condition. The architectural render lighting guide covers day, dusk, and night review.
How do you review an AI material study?
Use two passes. The first protects the design. The second judges the material. Do not praise texture before confirming that the room still belongs to the project.
| Review pass | Pass when | Reject when |
|---|---|---|
| Camera and crop | Horizon, verticals, framing, and field of view match the source | The view moves, widens, tilts, or cuts off a design decision |
| Surface assignment | Every finish stays on its named plane and respects openings | Material spills onto furniture, glazing, or adjacent walls |
| Material scale | Boards, units, slabs, and joints stay plausible across the frame | Texture grows, shrinks, or restarts without construction logic |
| Edges and repetition | Corners, reveals, seams, and grain remain continuous | Bonds break, mullions multiply, or patterns repeat like wallpaper |
| Light and color | Highlights, reflections, and color support the stated finish | Gloss, tint, or exposure hides the material decision |
If the camera fails, return to the source-led result. If one material fails, use Edit or name the bounded surface more clearly. If the material looks wrong only under warm light, compare it under neutral daylight before changing color.
Why do AI render materials look fake?
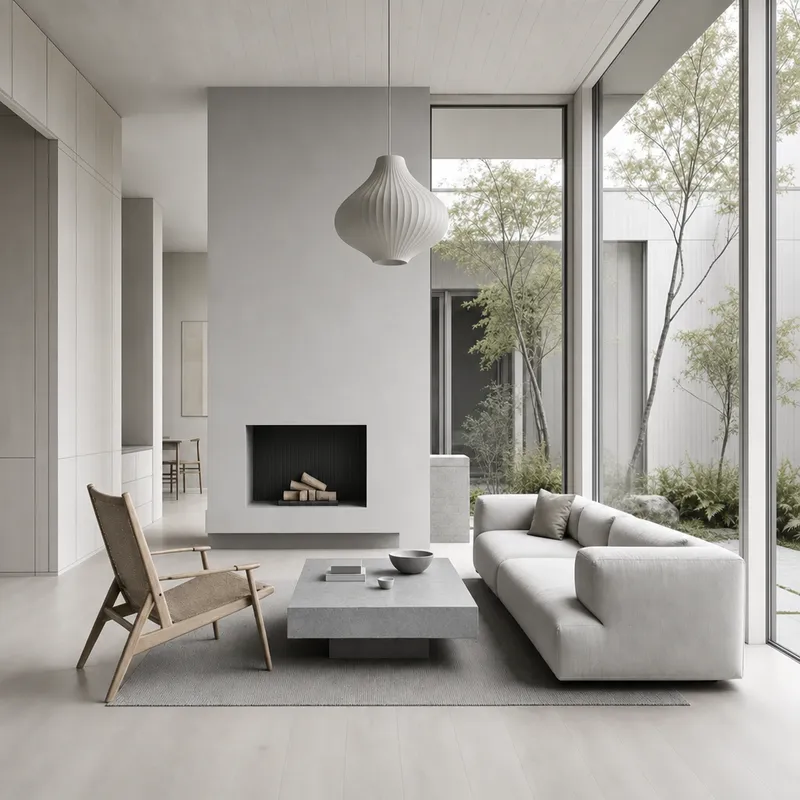
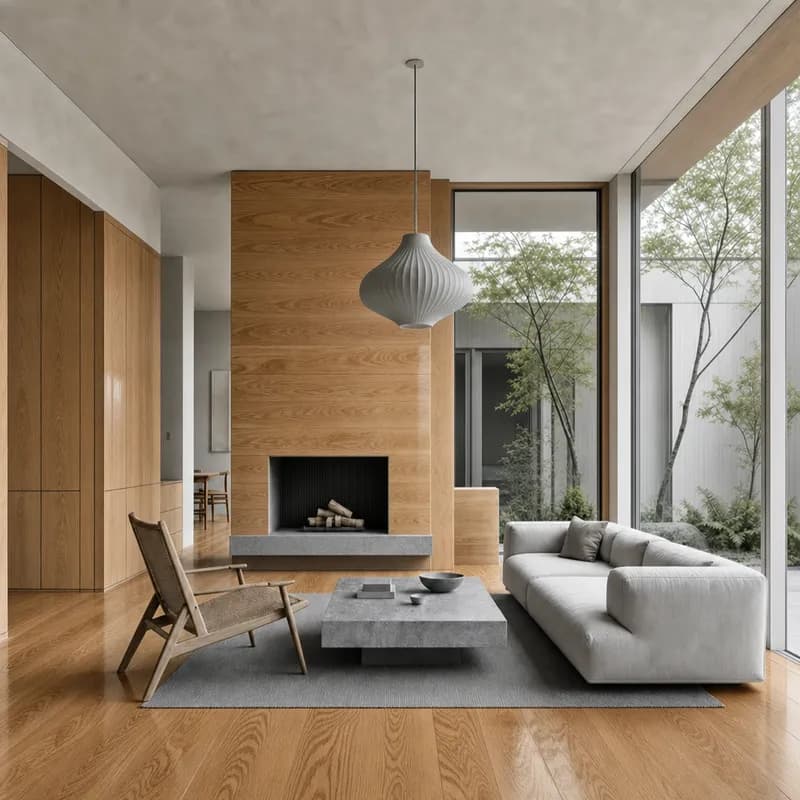
Common failures in this workflow include weak assignment, undefined finish, wrong scale, broken edges, and conflicting light. The four images below are intentionally flawed editorial examples. They are not failed CAD Scene runs.
| Symptom | Likely cause | Next instruction |
|---|---|---|
| Flat concrete | No forming, joints, relief, or directional light | Add restrained grain, panel rhythm, subtle pores, and soft side light |
| Plastic timber | Undefined coating, sharp sheen, or generic grain | Set matte oil, broad highlights, aligned grain, and exact board direction |
| Black glass | Reflection overwhelms transmission and frame depth | Reduce reflection, retain interior visibility, and protect mullions |
| Wallpaper brick | No unit scale, corner logic, bond, or mortar definition | Set running bond, corner continuity, unit scale, and joint width |
| Wrong surface | The location is vague or several changes compete | Name the bounded plane first and protect every adjacent material |
How do you keep materials consistent across a Project?
Write one accepted palette in the Project Materials field. Use the same names across related studies. Avoid switching between "oak," "light wood," and "timber" when they mean one finish.
A Preset can save Materials with the other Composition fields. Reuse it when several studies need one direction. Keep each source image tied to its own camera and visible geometry.
The architectural rendering styles guide separates visual technique from material direction. Generation details can record the Composition used for each finished Render.
When should you use a conventional renderer?
Use a conventional renderer when exact shaders and measured product data govern the deliverable. It is the better source for calibrated reflectance, transmission, displacement, procedural joints, render passes, and repeatable camera sets.
AI material studies fit visual direction and still-image review. They can help compare palette, finish, and atmosphere. The model, specification, and approved samples remain authoritative.
Questions about materials in AI renders
How do I change one material without changing the building?
Use a clean source image in Enhance, protect the camera and architecture in the instruction, and name one surface. Use Edit for a later bounded change. Review every result against the source.
Should I use Enhance or Edit for a material revision?
Use Enhance when the whole source needs a material and lighting pass. Use Edit when one named region in an existing image needs a focused material change.
Can I use a product photo as a material reference?
Yes, as visual context for color, grain, finish, and character. It does not transfer measured performance or guarantee an exact product match.
Can an AI render confirm a material specification?
No. Use the image for visual direction. Confirm products, performance, color, finish, and construction with specifications, samples, mockups, and measured data.
Why does a material look right close up but wrong across the room?
The local texture may be convincing while its assignment, unit scale, repetition, or joints fail across the full surface. Review the whole image before the detail crop.
Table of Contents
- What makes a rendered material believable?
- Should you use Create, Enhance, or Edit for materials?
- How do you write a complete material brief?
- What does a controlled material study look like?
- How do you render believable concrete?
- How do you render natural timber?
- How do you render glass and reflections?
- How do you render brick and stone?
- Can you use a product photo or sample as a reference?
- How should light expose the material?
- How do you review an AI material study?
- Why do AI render materials look fake?
- How do you keep materials consistent across a Project?
- When should you use a conventional renderer?
Authors

- Name
- Vladimir Mindru
Previous Article
Table of Contents
- What makes a rendered material believable?
- Should you use Create, Enhance, or Edit for materials?
- How do you write a complete material brief?
- What does a controlled material study look like?
- How do you render believable concrete?
- How do you render natural timber?
- How do you render glass and reflections?
- How do you render brick and stone?
- Can you use a product photo or sample as a reference?
- How should light expose the material?
- How do you review an AI material study?
- Why do AI render materials look fake?
- How do you keep materials consistent across a Project?
- When should you use a conventional renderer?
Authors
- Name
- Vladimir Mindru