
- Updated on
GPT Image 2.5 for Architecture: Flare vs Sunburst
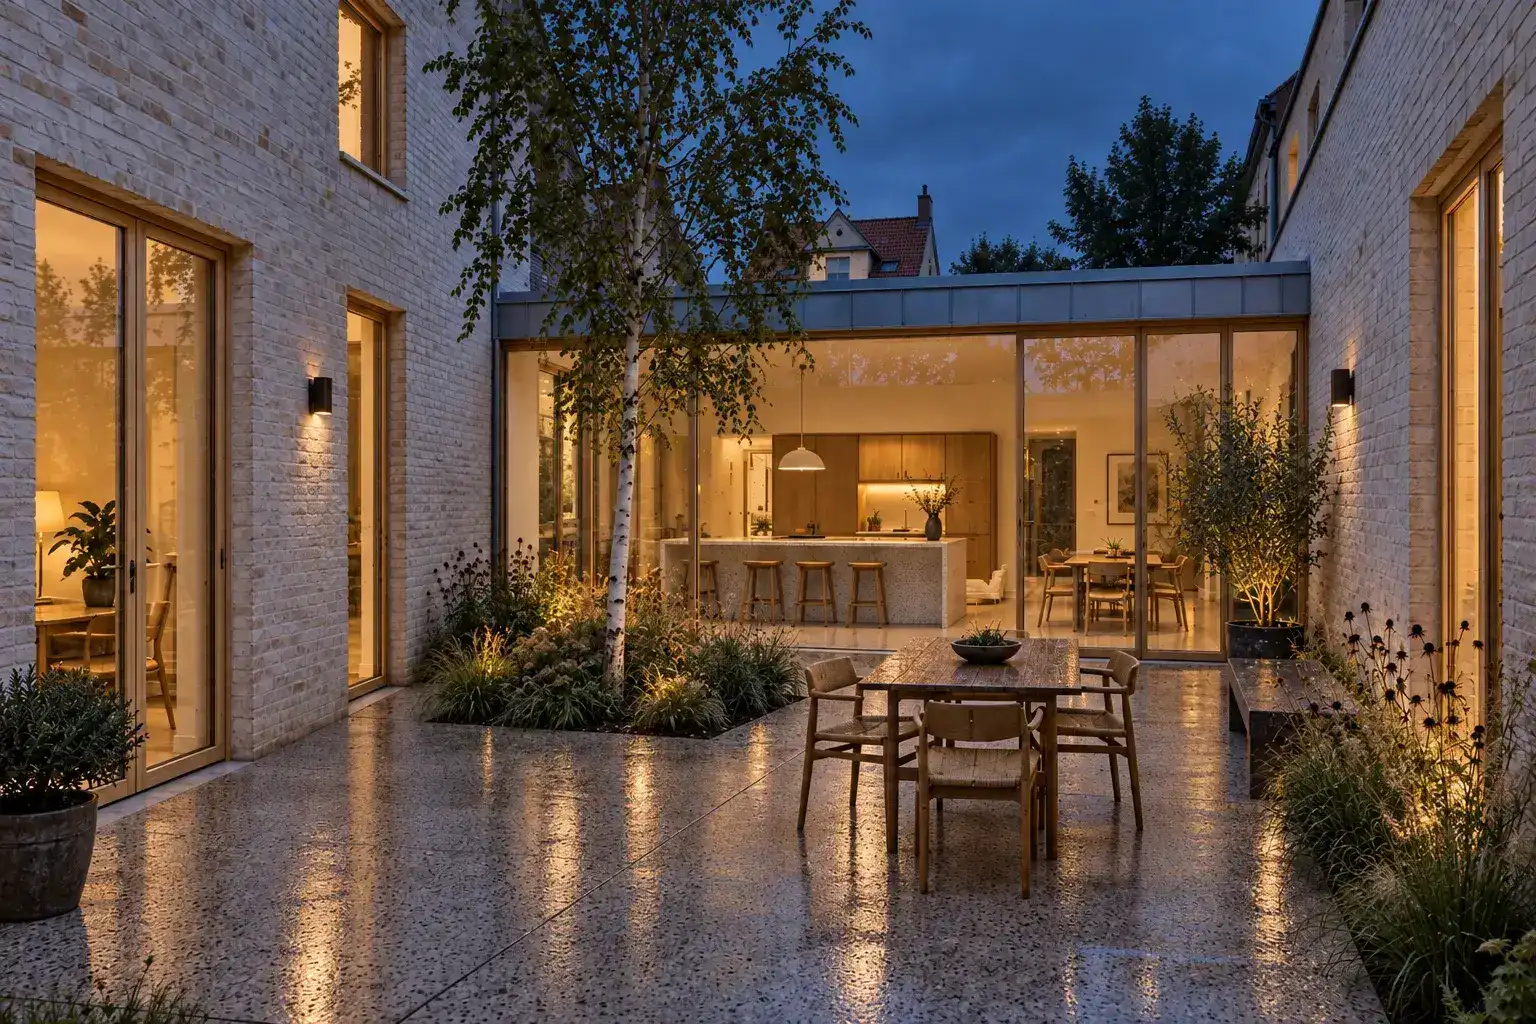
GPT Image 2.5 is now available in CAD Scene for architectural rendering. Choose GPT Image 2.5 Flare for faster studies. Choose GPT Image 2.5 Sunburst when detail and editing precision matter more.
Both models work across Create, Enhance, and Edit. They also support Low, Medium, and High Quality plus 1K, 2K, and 4K Resolution. CAD Scene keeps the model inside one architectural workspace. Your Project settings, studies, references, render history, and image operations remain in place.
What is GPT Image 2.5?
GPT Image 2.5 is OpenAI's current image-generation and image-editing family. OpenAI released two API models on September 8, 2026.
GPT Image 2.5 Flare is built for fast, high-quality everyday generation. OpenAI positions it as the default choice for most applications.
GPT Image 2.5 Sunburst is built for premium visual work. It favors tighter control across edits and more detailed creative output. That precision comes with longer generation times.
OpenAI's ChatGPT Images 2.5 announcement also describes sharper detail, more natural light, richer texture, stronger subject preservation, and more reliable edits. These are provider claims, not a guarantee for every architectural brief.
GPT Image 2.5 Flare vs Sunburst
The best GPT Image 2.5 model depends on the decision you need to make.
| Question | Flare | Sunburst |
|---|---|---|
| Best starting point | Rapid architectural studies | Detailed visual development |
| Generation priority | Speed | Precision |
| Useful for | Early options, prompt tests, and broader batches | Material detail, polished images, and controlled edits |
| Tradeoff | Less time per study | Longer generation for tighter control |
| CAD Scene modes | Create, Enhance, and Edit | Create, Enhance, and Edit |
Flare is usually the practical first pass. Use it to test a prompt, camera intent, material direction, or lighting condition. It also suits several parallel options from one brief.
Sunburst is the stronger candidate for a final material pass or a narrow image edit. Use it when the work depends on preserving a subject, keeping details consistent, or controlling a specific change.
Architectural render examples from the same brief
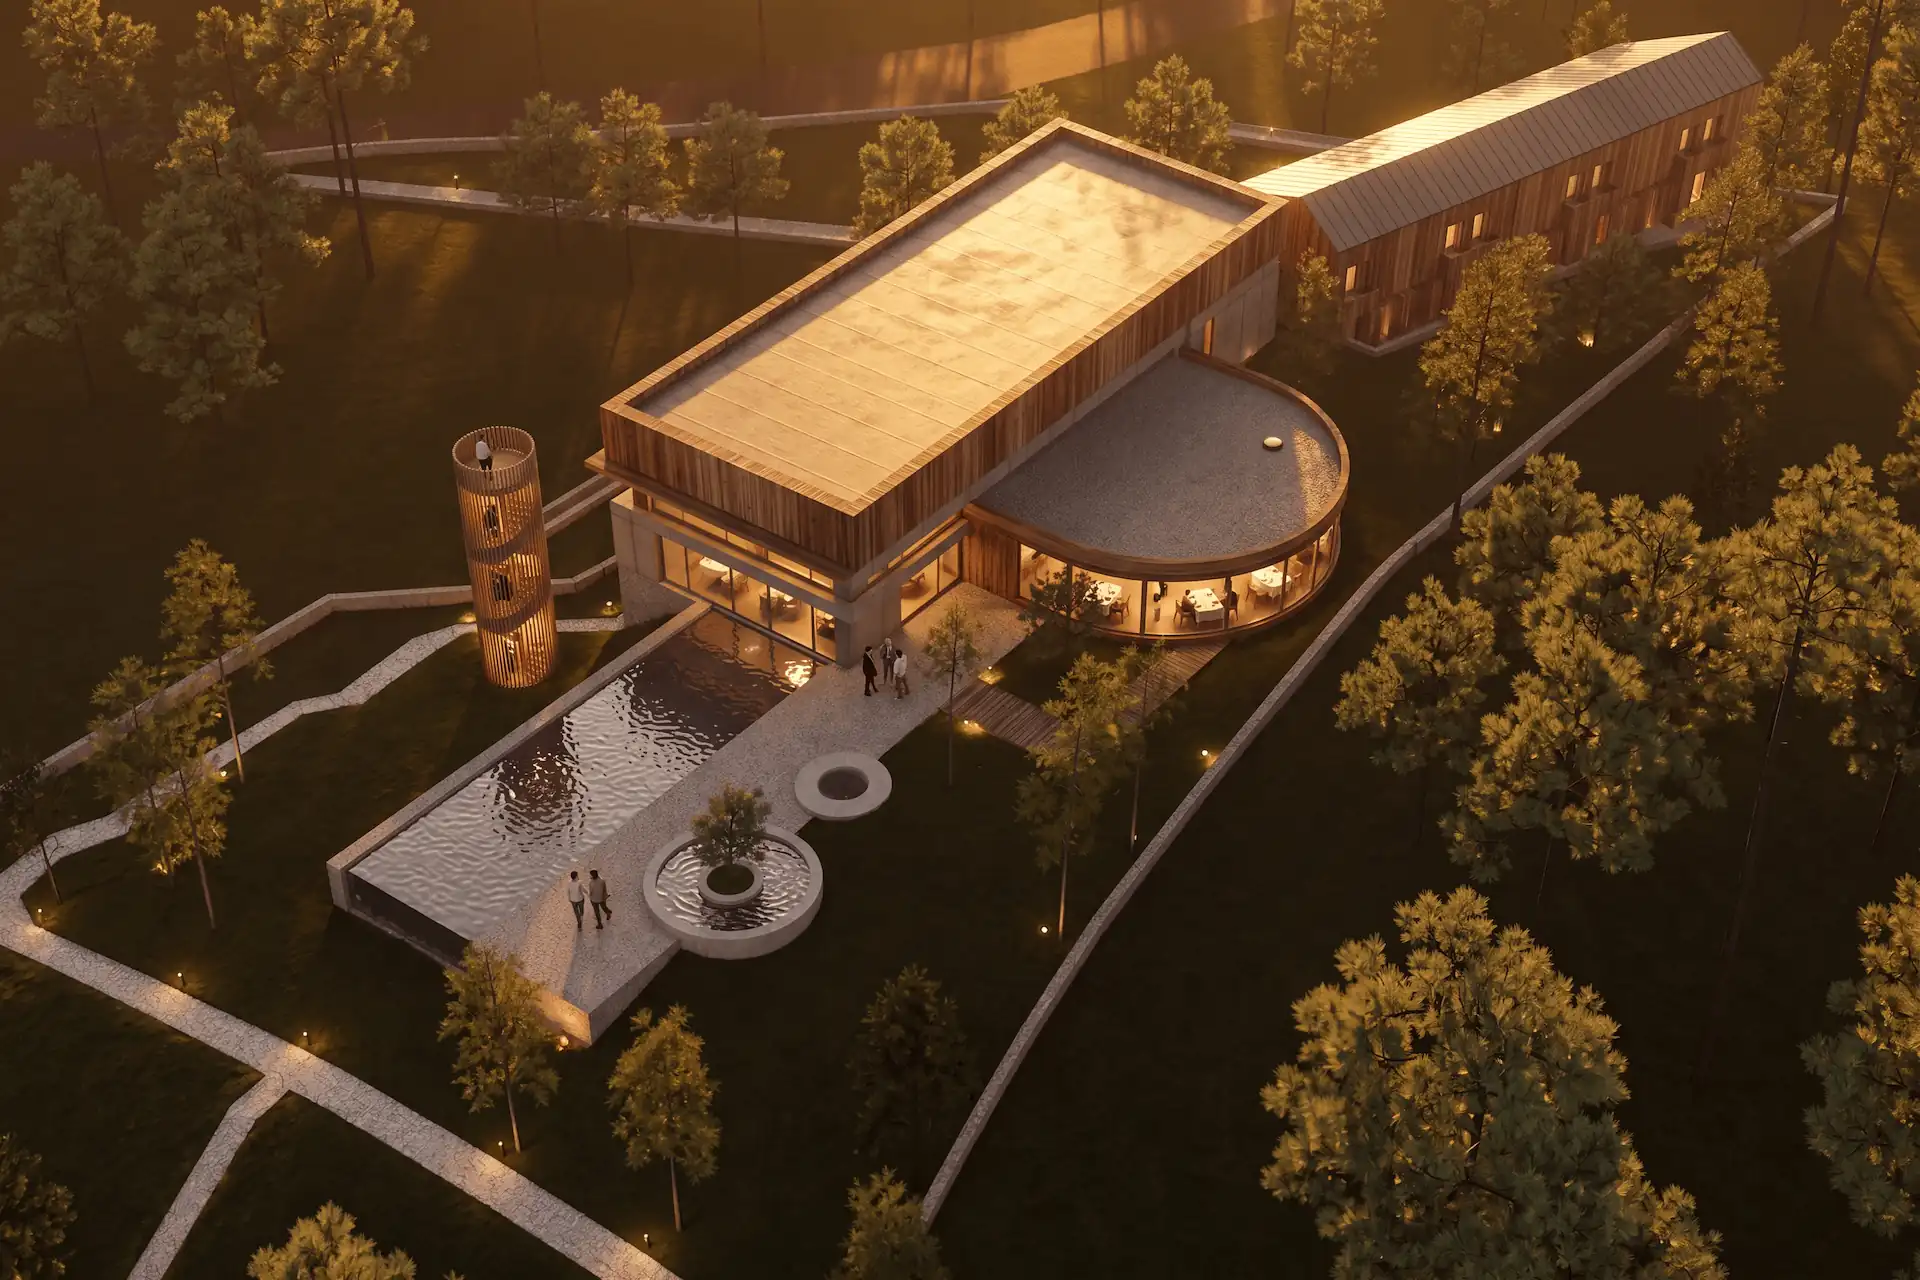
The two images below use the same courtyard-house brief. Each is an independent generation. They show the kind of architectural output each model can produce. They are not a controlled benchmark. Sampling can change composition and detail between runs.
These examples use the OpenAI Images API through CAD Scene's article pipeline. They are editorial examples, not measured production-workspace results.
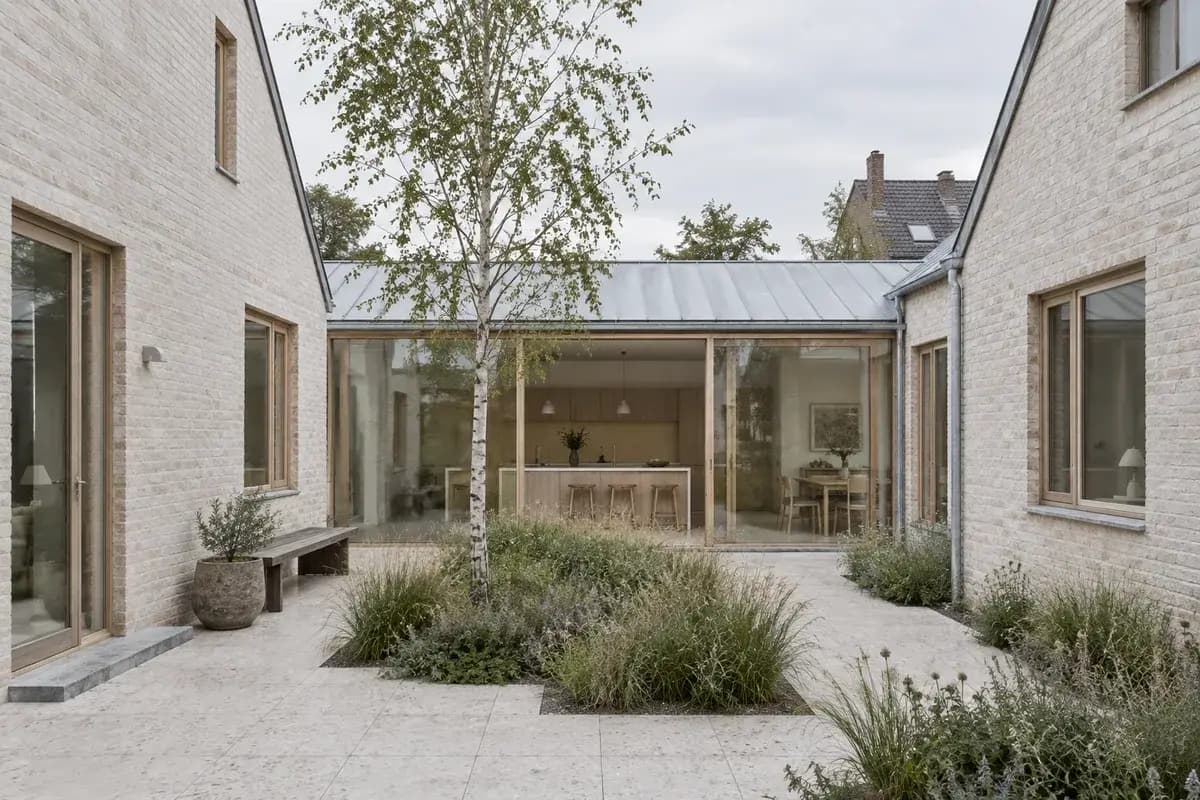
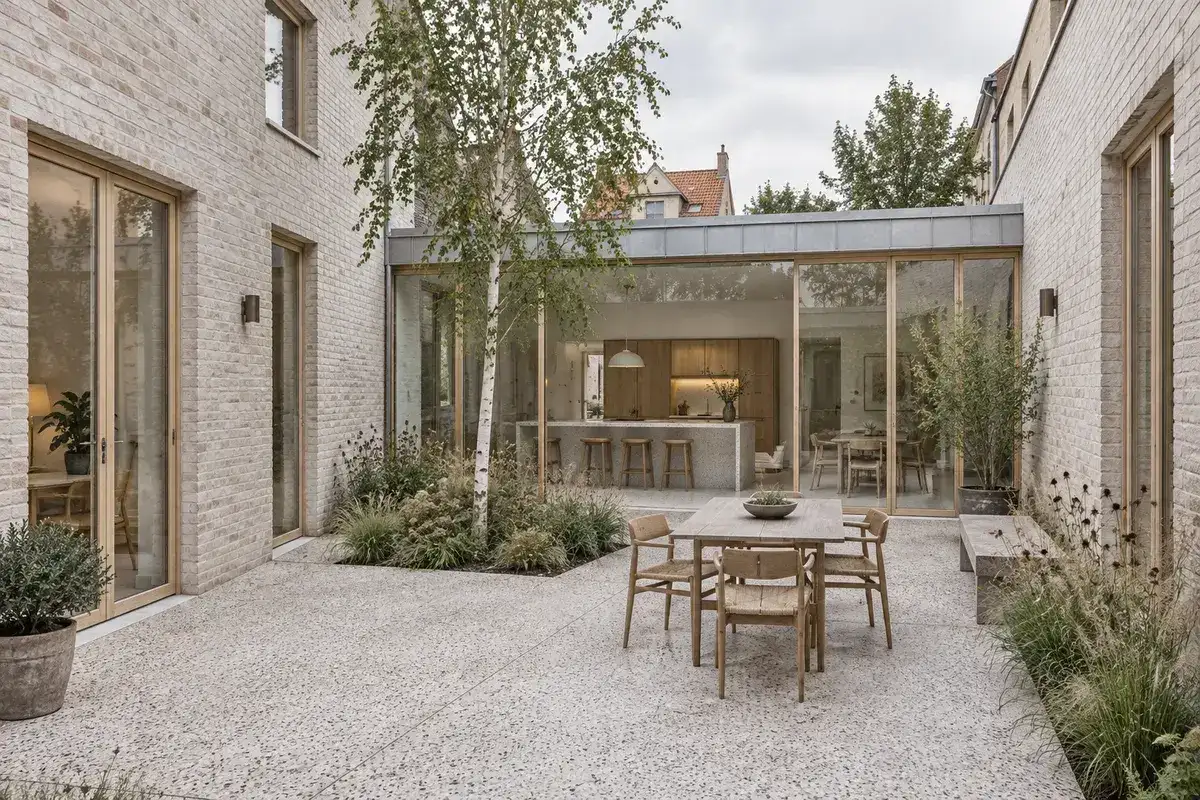
Judge each result against the brief. Check window rhythm, roof edges, floor levels, furniture scale, planting, and material junctions. A persuasive image can still contain a design error.
How to use GPT Image 2.5 in CAD Scene
- Start a Project or open an existing one.
- Set the Composition for Style, Scene, Lighting, Materials, and Entourage.
- Choose Create, Enhance, or Edit.
- Open Render settings from the model control.
- Choose GPT Image 2.5 Flare or GPT Image 2.5 Sunburst.
- Review Quality, Resolution, and Create Aspect.
- Choose the number of parallel images.
- Send the render and compare it against your source or brief.
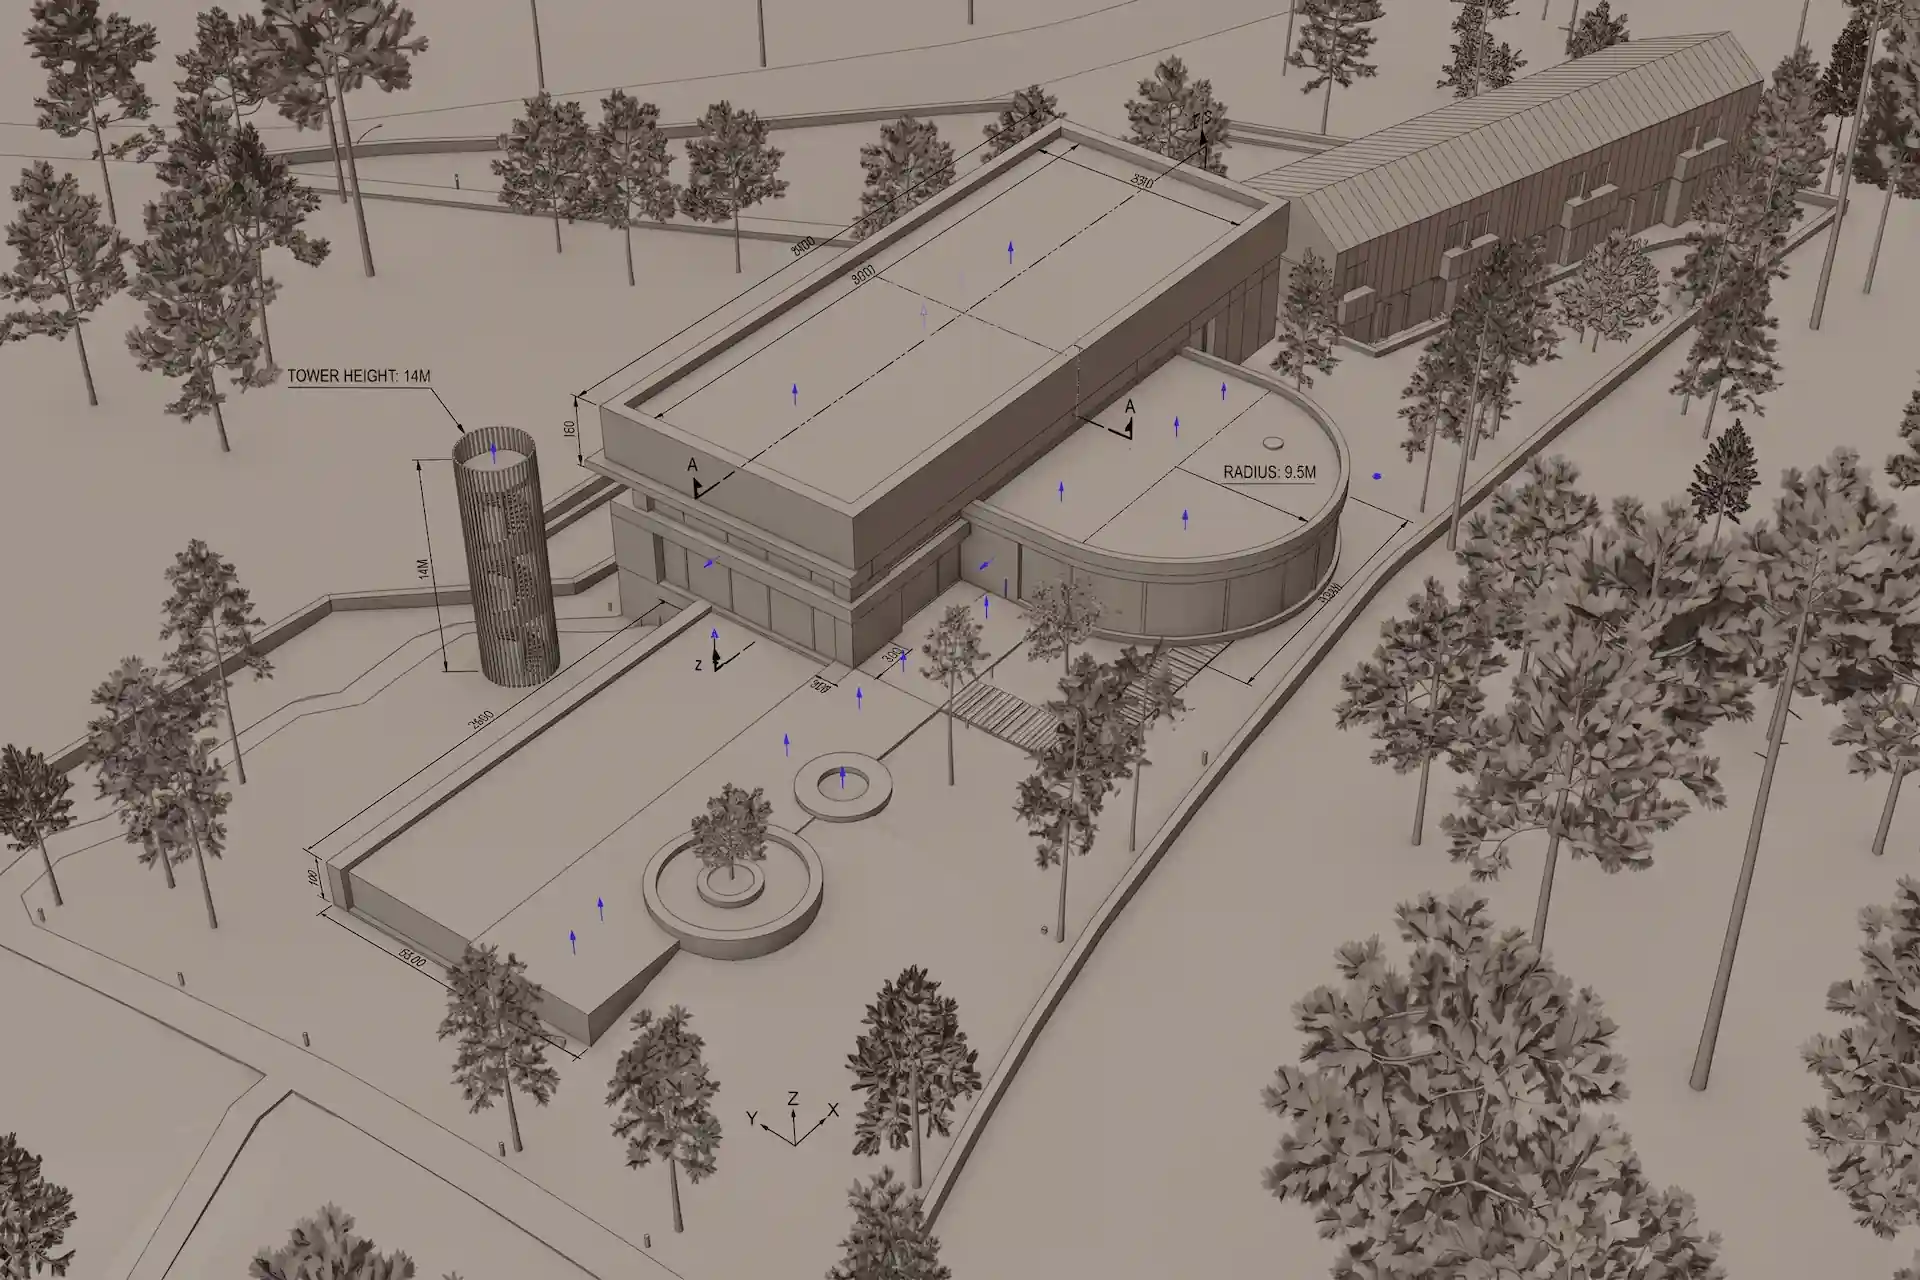
Start with Create when the scene can remain open. Use Enhance when a 3D screenshot already fixes the camera and visible geometry. Use Edit when one or more named regions must change inside an existing image.
The broader AI architectural rendering guide explains this mode-first workflow. The screenshot-to-render method covers source capture and comparison in more detail.
Before / after
Try GPT Image 2.5 on your own architecture scene.
Which GPT Image 2.5 settings should you choose?
Both GPT Image 2.5 models expose the same CAD Scene settings.
Quality
Use Low Quality for broad tests. Use Medium for normal studies. Move to High when a visible detail problem survives at Medium.
A higher label does not guarantee a better design. It asks the provider to do more work. Keep the prompt, source, model, and Resolution fixed when comparing Quality.
Resolution
Use 1K for quick direction checks. Use 2K for most review images. Choose 4K when the composition needs more native pixels.
GPT Image 2.5 supports custom provider dimensions inside its limits. CAD Scene presents 1K, 2K, and 4K presets instead. Create also offers the supported Aspect choices directly.
Outputs above 2,560×1,440 pixels are experimental in OpenAI's current documentation. The final measured Output size can differ from the Requested size. CAD Scene records both in Generation details.
Credit cost
Flare and Sunburst use the same CAD Scene credit matrix. Quality and Resolution set the per-image rate. The image count multiplies it.
The exact total appears in Render settings before Send. Failed generations receive an automatic credit refund. A free Lanczos 4K upscale remains available after generation.
How should architects prompt GPT Image 2.5?
Write the prompt as a visual brief. State the building, camera, materials, light, landscape, occupation, and constraints. Keep each instruction concrete. The architecture render prompt guide develops that structure across common project stages.
A useful Create prompt might read:
Eye-level three-quarter view of a compact urban library courtyard. Pale brick, deep oak window reveals, zinc roof edges, and wet stone paving. Soft overcast daylight with open shadow detail. Keep verticals controlled. Show three people at natural scale. No text or signage.
For Enhance, describe the finish while protecting the source:
Keep the camera, crop, massing, openings, roof geometry, and floor levels unchanged. Develop the clay view as pale brick and oak. Add restrained native planting. Use soft Nordic daylight.
For Edit, name the marked region and limit the change:
Change Facade to warm grey-beige rammed earth. Keep the openings, corners, camera, paving, roof, and planting unchanged.
The result below starts from the Flare courtyard study. Sunburst changes one material direction while the prompt asks every other visible relationship to hold.
Flare study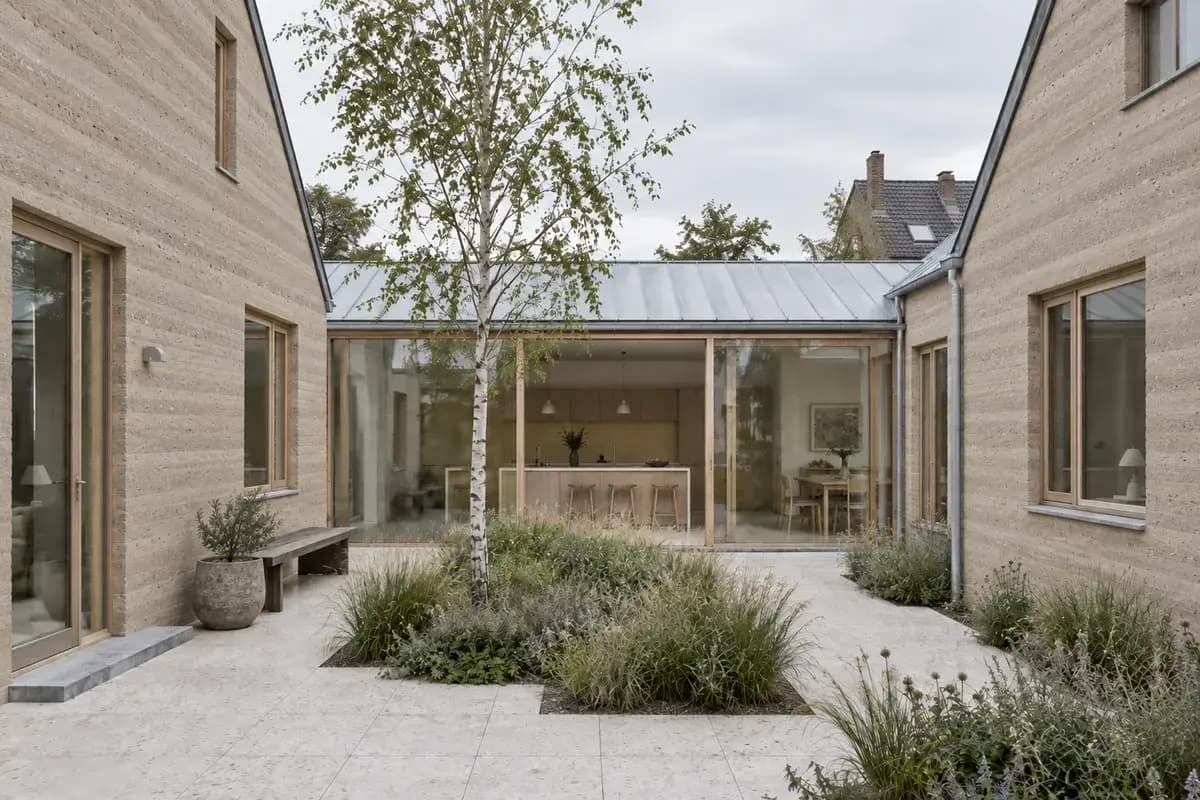 Sunburst edit
Generative edits can still drift. Review the crop, openings, edges, and unchanged materials after every pass. If a region must remain pixel-identical, composite the approved edit into the source.
Can GPT Image 2.5 render interior design?
Yes. The same process works for interior architecture and design visualization. Name the room, viewpoint, fixed geometry, finish palette, light, furniture character, and intended use.
Use Flare to compare several interior directions. Use Sunburst for a detailed material pass or a controlled furniture and finish edit. Reference images can guide visual character in Create and Enhance.
The realistic material rendering guide covers texture scale, junctions, reflections, and review limits.
GPT Image 2.5 Edit in CAD Scene uses the source image and mask without extra Composer references. Switch to Enhance when the task needs broader reference context.
Where GPT Image 2.5 fits in an architecture workflow
GPT Image 2.5 is useful for visual decisions. It can test atmosphere, material character, occupation, landscape, and presentation direction.
It does not verify dimensions, construction, product specifications, daylight performance, code compliance, or hidden geometry. Keep the model and drawings as the project record. Use renders for review and communication.
See how AI render credits work for the full pricing method. The model and credit Help article holds the current operational settings.
CAD Scene adds the working structure around the model:
- one Project context across several studies;
- Create, Enhance, and Edit modes;
- model-specific Quality, Resolution, and Aspect;
- several parallel options from one Send;
- later Variations from a finished Render;
- durable jobs that continue after the tab closes;
- Generation details and render history;
- automatic credit refunds after failed generation.
GPT Image 2.5 FAQ
Is GPT Image 2.5 available in CAD Scene?
Yes. GPT Image 2.5 Flare and GPT Image 2.5 Sunburst are available as separate render-model choices.
Should I use GPT Image 2.5 Flare or Sunburst?
Start with Flare for faster studies. Choose Sunburst when detailed output or tighter editing control matters more than generation time.
Can GPT Image 2.5 turn a 3D screenshot into a render?
Yes. Use Enhance with a clean screenshot. Keep the camera and visible geometry fixed in the brief, then describe materials, light, landscape, and occupation.
Can GPT Image 2.5 edit an architectural render?
Yes. Use Edit for named marked regions. Review every result because unmarked details can still drift.
Does GPT Image 2.5 support 4K images?
CAD Scene offers a 4K Resolution preset. OpenAI currently marks outputs above 2,560×1,440 as experimental. Generation details records requested and measured size separately.
Do Flare and Sunburst cost the same credits?
Yes in CAD Scene. Both use the same credit matrix. Quality, Resolution, and image count set the total shown before Send.
Is GPT Image 2.5 accurate enough for construction documents?
No. Use it for visual direction and communication. Verify dimensions, assemblies, products, and performance in the project model, drawings, and specifications.
Table of Contents
- What is GPT Image 2.5?
- GPT Image 2.5 Flare vs Sunburst
- Architectural render examples from the same brief
- How to use GPT Image 2.5 in CAD Scene
- Which GPT Image 2.5 settings should you choose?
- How should architects prompt GPT Image 2.5?
- Can GPT Image 2.5 render interior design?
- Where GPT Image 2.5 fits in an architecture workflow
- GPT Image 2.5 FAQ
Authors

- Name
- Vladimir Mindru
Table of Contents
- What is GPT Image 2.5?
- GPT Image 2.5 Flare vs Sunburst
- Architectural render examples from the same brief
- How to use GPT Image 2.5 in CAD Scene
- Which GPT Image 2.5 settings should you choose?
- How should architects prompt GPT Image 2.5?
- Can GPT Image 2.5 render interior design?
- Where GPT Image 2.5 fits in an architecture workflow
- GPT Image 2.5 FAQ
Authors
- Name
- Vladimir Mindru