
- Published on
Massing Model to Render: Photoreal Studies from a White Model
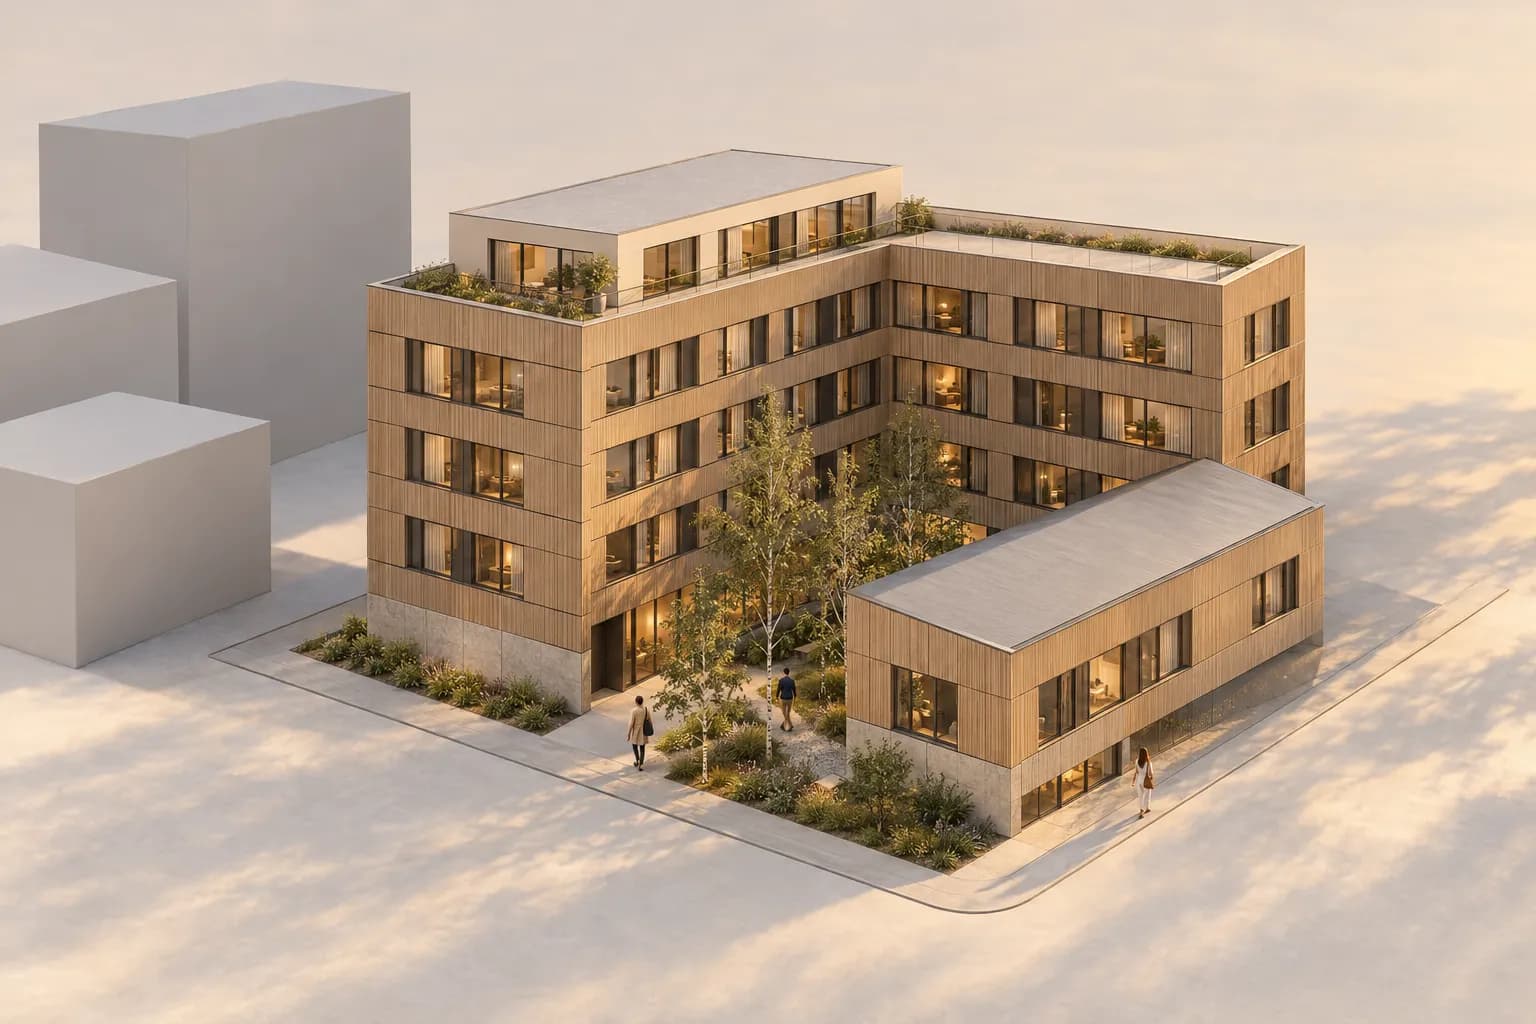
To render a massing model with AI, export one clean view of the white model. Use it as the source image in Enhance. The model fixes the volumes, heights, setbacks, roof forms, and camera. It does not fix openings, facade rhythm, or materials. The image model proposes those. Decide in advance what it may propose, and say so in the brief.
Add floor lines or opening zones to the model when they matter. Keep the context blocks pale so the proposal stays the subject. Then compare the result with the model. A photoreal massing render asks a design question in finished materials. Treat it as a study, not as a resolved facade.
What does a massing model tell an AI render?
A white massing model is a strong source for one reason. It carries the decisions you have made and nothing else. Volume, height, footprint, setback, roof pitch, and the relationship to neighbours are all visible. Surface finish and openings are not.
That split decides what the render can preserve. CAD Scene Enhance asks the image model to keep the source camera, framing, geometry, and proportions. That instruction is a constraint, not a measured guarantee. Generated details can still drift.
| Decision | Set by the white model | Proposed by the image |
|---|---|---|
| Volumes and footprint | ||
| Heights and setbacks | ||
| Roof form | ||
| Camera and crop | ||
| Storey count | Only if floor lines are modeled | Otherwise inferred |
| Openings and facade rhythm | Only if opening zones are modeled | Otherwise invented |
| Materials and joints | ||
| Planting, people, and ground |
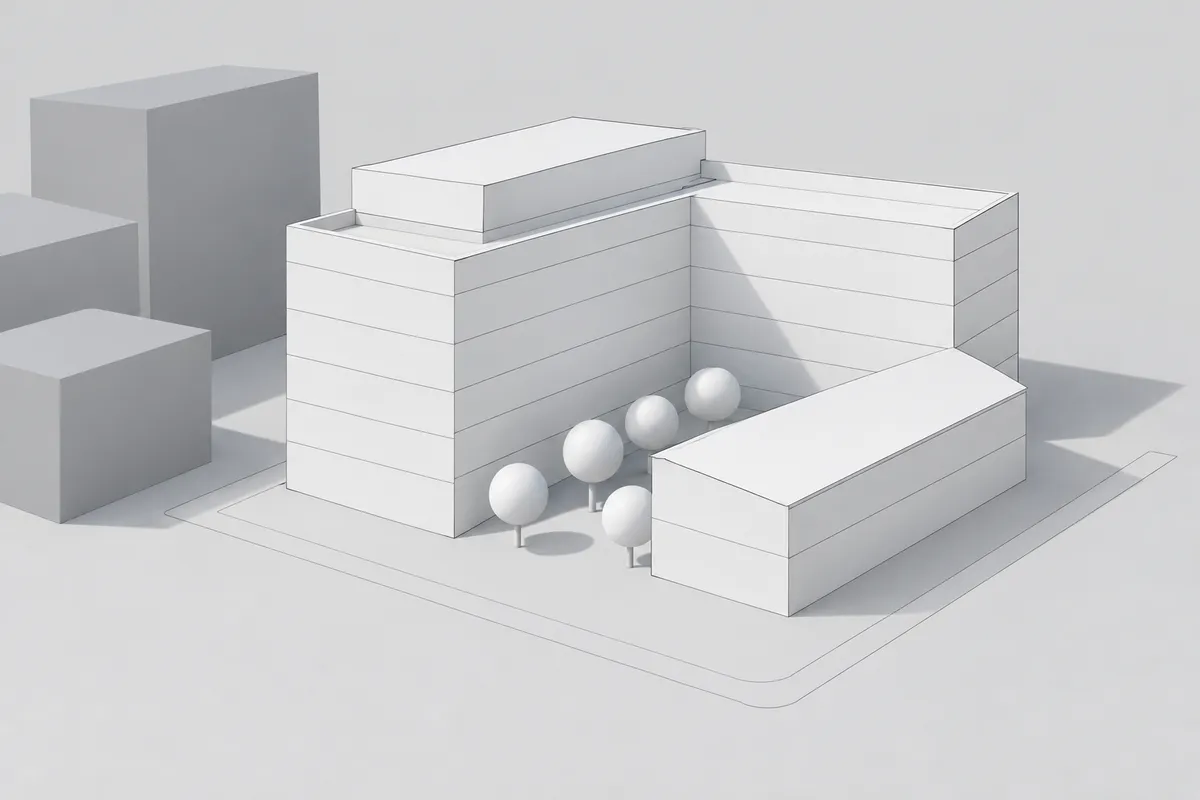 White massing
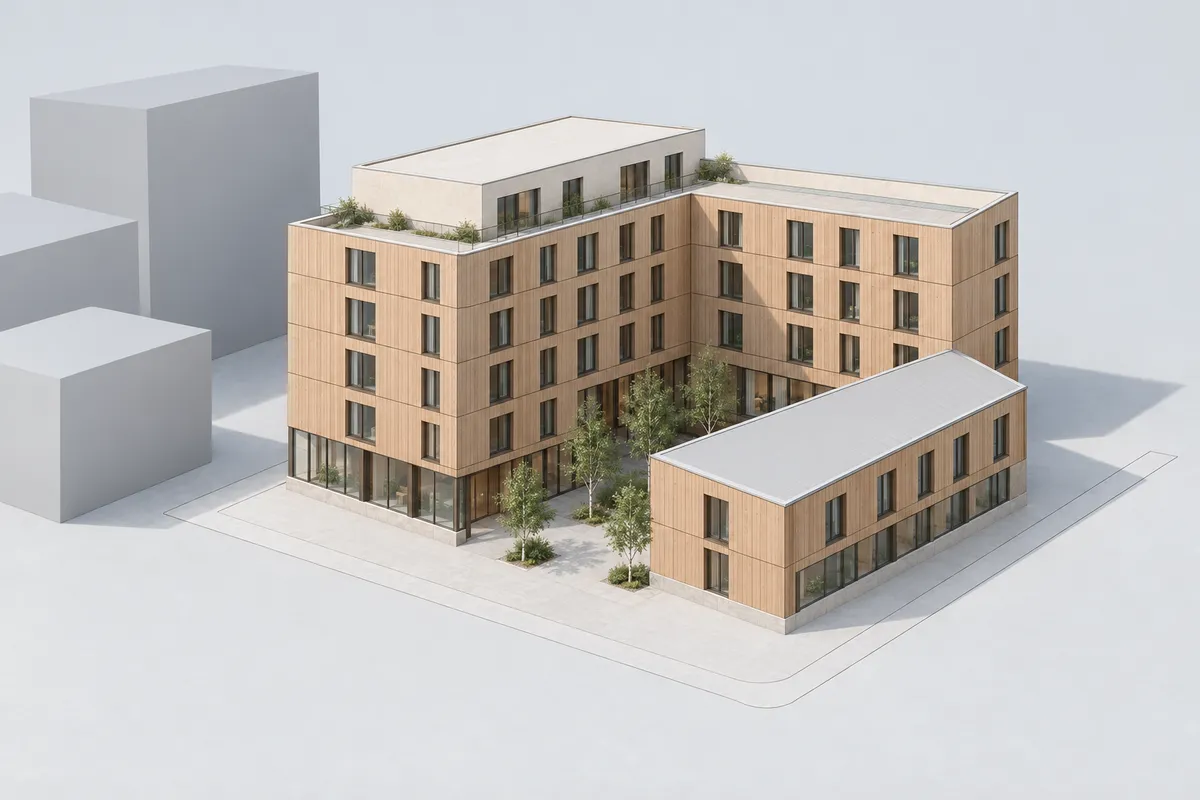 Material study
The model view above has floor-line grooves and no windows. The study kept the volumes and the setback top floor. It also placed a window grid, a glazed ground floor, and an entrance that nobody designed. That is useful for a conversation. It is not a facade decision.
Which AI tools can render a photoreal exterior from a massing model?
Any tool that accepts a source image and respects its composition can start from a massing view. The routes differ in control, context, and cost of iteration. Choose by the decision under review, not by the most finished image.
| Route | Best use | Main limit |
|---|---|---|
| Browser image workbench | Fast material and light options from one exported view | Reads pixels only, so hidden faces stay inferred |
| Plugin inside the modeler | Iterating while the massing still changes | Tied to one host tool and its license |
| General AI image app | Loose atmosphere and early mood | Less project structure, and geometry control varies |
| Traditional render engine | Measured light, resolved materials, and animation | Needs modeled facades and material setup first |
CAD Scene sits in the first row. One project holds the Style, Scene, Lighting, Materials, and Entourage across every study. Enhance keeps the exported view as the starting point. The best AI rendering software for architects guide compares named tools with dated sources. The CAD Scene vs ChatGPT comparison covers the general-app route. The AI versus traditional rendering guide explains when a render engine is the better fit.
How much detail should the massing model carry?
Model the decisions you want the image to respect. Leave out the decisions you want it to explore. A bare block invites invention. A block with floor lines holds the storey count far better.
| Source detail | What it holds | What stays open |
|---|---|---|
| Bare blocks | Volume, height, footprint, roof | Storeys, openings, materials |
| Blocks with floor lines | Adds storey count and floor rhythm | Openings and materials |
| Floor lines plus opening zones | Adds bay rhythm and solid-to-glass ratio | Frames, reveals, materials |
| Developed facade model | Openings, recesses, and key joints | Finish, light, and atmosphere |
Floor lines can be a shallow groove, a thin face split, or a slab edge. Opening zones can be flat rectangles in a darker grey. Neither needs real windows. Once the facade is modeled, the task changes. The facade rendering review method covers openings, depth, and material zones in detail.
How do you prepare the white model view?
Prepare a visual source, not a working viewport. The goal is one quiet image with readable volumes, clear edges, and directional light.
Fix the camera
Save the view at its final aspect ratio. Choose a height that shows the roof and setbacks you need to review.Set one neutral face style
Display every face in one pale tone. Keep thin dark edges so each volume reads against its neighbour.Turn on sun shadows
Use directional shadows to explain depth, setbacks, and roof pitch. Avoid flat ambient light alone.Keep the context quiet
Show neighbours as simple grey blocks. Remove guides, axes, section planes, tags, and selection highlights.Export one clean image
Save a PNG with the final crop and enough pixels for review. Check it at full size before use.
In SketchUp, the Face Settings in the Styles panel include Shaded Using All Same. It shows every face in the selected front color. Ambient Occlusion adds edge depth with Distance and Intensity controls. Real-world shadows need a geolocated model. The Shadows panel then sets the time, date, and light and dark levels.
In Rhino 8, the Arctic display mode turns objects and the background white and adds soft shadows. McNeel describes it as essentially an ambient occlusion mode. Use ViewCaptureToFile to export the view at a set size.
The SketchUp screenshot workflow and the Rhino viewport guide cover saved views and export in each tool. The clean screenshot checklist covers crop, overlays, and edges across modeling tools.
White massing / material study
Test one massing view in CAD Scene.
What should the Enhance brief say?
The source carries the volumes. The brief carries everything else. Name what must stay fixed. Assign one material to each volume. Describe the opening rhythm plainly, and say how the context should read.
White massing to material study
Copy the full brief, then adjust one variable at a time.
Prompt
Preserve the exact camera, crop, volumes, building heights, floor lines, setback top floor, roof terrace, two-storey wing with its mono-pitched roof, courtyard, and context block positions. Do not add or remove storeys. Render pale vertical oak cladding on the main volume, warm off-white mineral render on the setback top floor, and a honed stone plinth. Place dark bronze windows in a calm regular rhythm aligned to the floor lines. Glaze the ground floor and recess the entrance. Keep the context blocks as pale untextured massing. Use even Nordic daylight with soft shadows. Add simple birch planting in the courtyard.
Set the Project Composition before sending. Name the Style, Scene, Lighting, Materials, and Entourage that every study shares. Then each new option changes only what you ask it to change. Use Edit later for one bounded correction, such as an entrance or a single bay.
Two lines in that brief do most of the work. "Do not add or remove storeys" protects the height. "Keep the context blocks as pale untextured massing" protects the hierarchy. The architecture render prompt guide shows how to separate subject, materials, light, camera, and constraints.
Prompt library · 28 promptsSource-preservation promptsBrowse prompts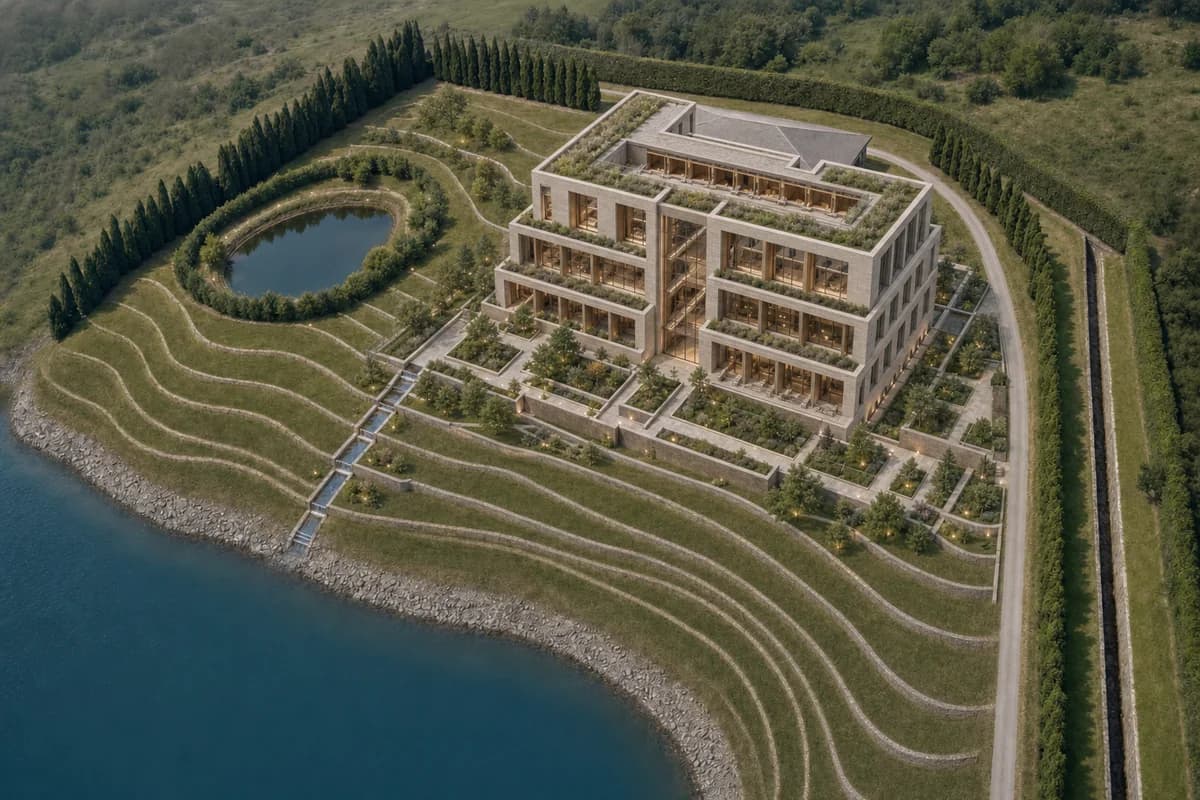
How can one massing test several facade directions?
Keep the source, crop, and brief structure fixed. Change one decision group at a time. Material first, then light. Each option is then a fair comparison, not a different building.
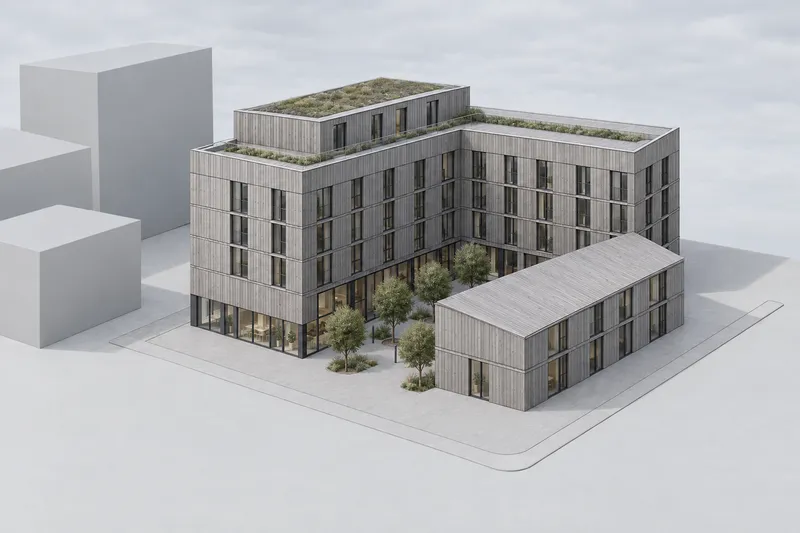
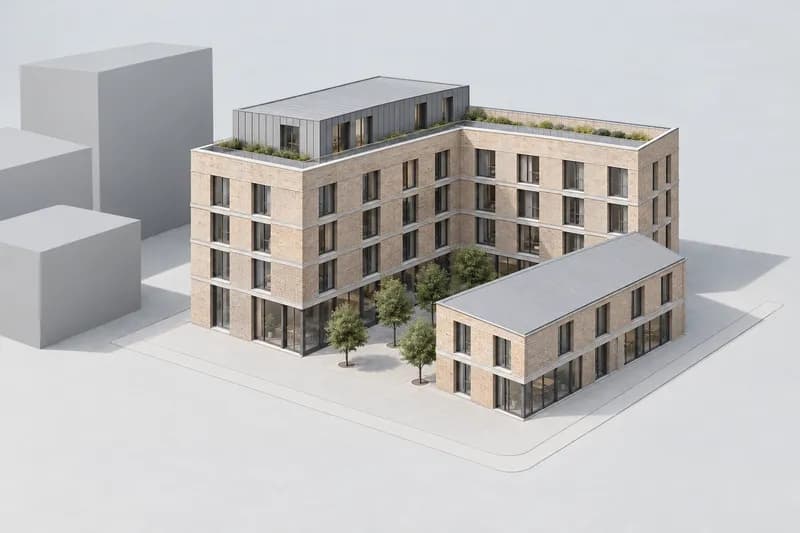
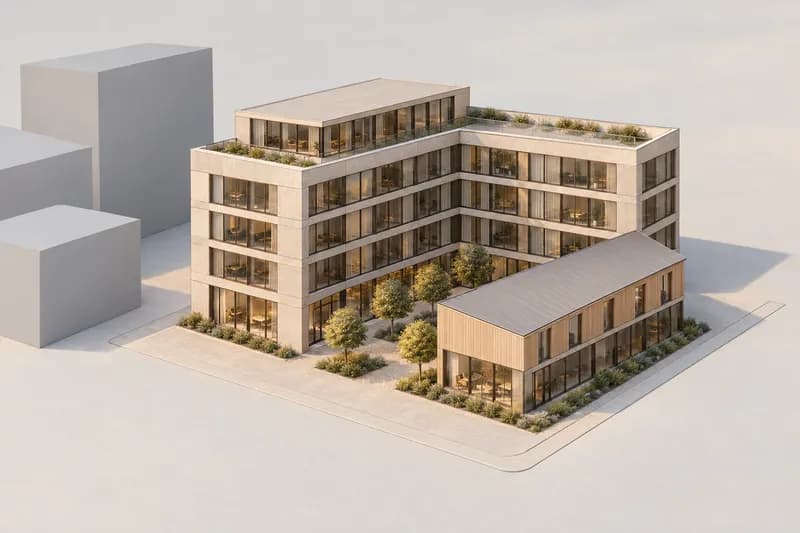
All three derive from the same white massing image. The volumes and context hold. Each image still proposed its own window grid. Compare the window rhythm across options before you compare materials. CAD Scene can return parallel options from one Send, so the set arrives together.
What goes wrong when a massing model becomes a render?
The common failures look convincing at a glance. They come from the gap between what the model shows and what a finished image needs.
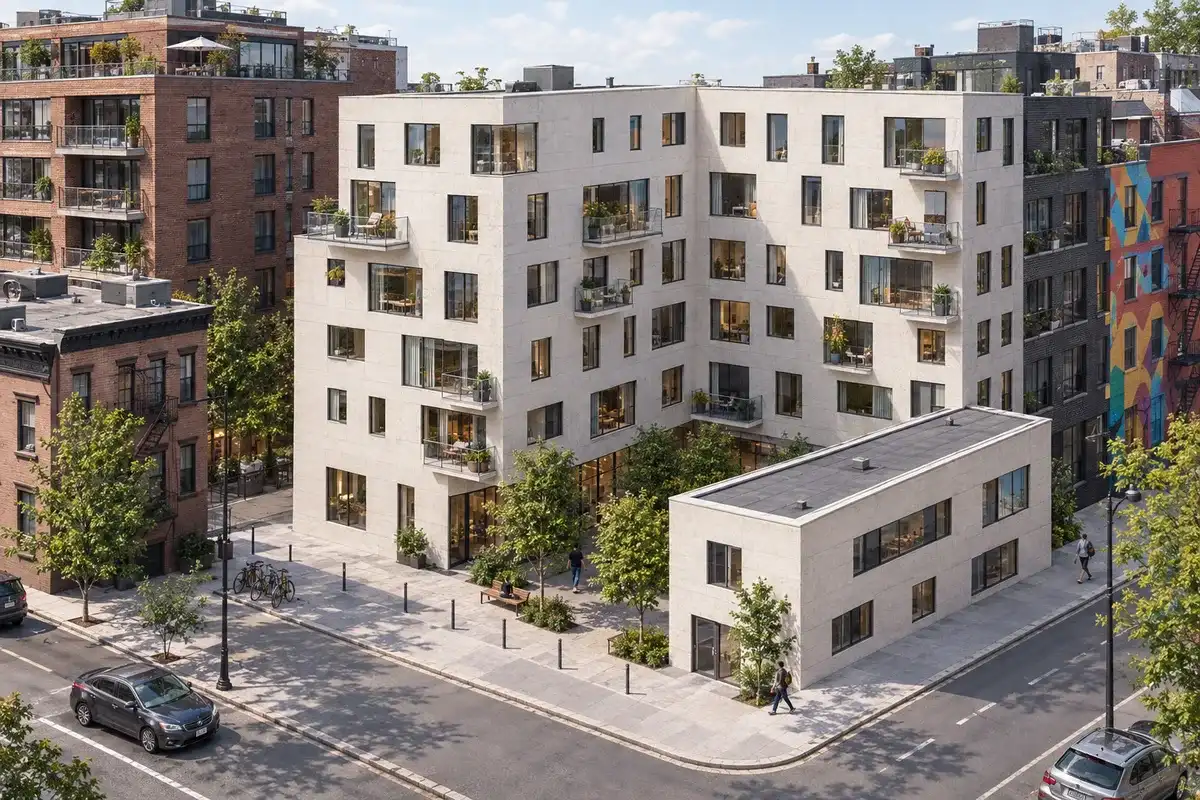
- Extra or missing storeys. Bare blocks give no floor count. Model floor lines and state the count rule in the brief.
- A lost setback or roof terrace. Thin offsets read as noise. Make the setback deep enough to cast a clear shadow.
- Openings that ignore the floor lines. Ask for a rhythm aligned to the floor lines. Model opening zones when the rhythm matters.
- Invented balconies, canopies, or rooftop plant. Name what must stay absent. Reject any image that adds them.
- Context that competes. Grey blocks can become detailed neighbours. Ask for pale untextured context, or crop it out.
- Ambiguous scale. A white model has no scale cues. Add two or three people in the brief and check them against the floor height.
How do you review a massing render?
Review the massing before the materials. Place the exported model view beside the render at the same size.
- Trace the outer silhouette and roof line of every volume.
- Count the floor bands on each volume.
- Check the setback depth and the roof terrace edge.
- Compare heights against each context block.
- Mark every opening, entrance, and balcony as proposed.
- Reject added storeys, plant, canopies, or volumes.
- Check that the context still reads as background.
The render-retention method defines a repeatable source check. It sets criteria. It does not publish a cross-tool benchmark result. Before a client meeting, use the client render review checklist. It separates visible decisions from items that still need work.
Where does a massing render fit in the design process?
Massing renders earn their place early. They help when the form is settled enough to discuss, but the facade is not.
- Feasibility and option reviews. Show two or three volumes in a believable finish without modeling facades.
- Early client meetings. Give a client something they can read, then label it as a direction.
- Competition boards. Pair a photoreal hero with honest diagrams. The competition render guide covers the set.
- District studies. At larger scale, the urban design rendering guide covers movement and public space.
Sometimes the white model is the right deliverable. A clay or white-model look keeps the conversation on form. The soft architectural rendering guide covers when that reads better than photoreal.
A massing render is not a verified view. It has no surveyed camera, calibrated model, or stated accuracy method. Do not use it where an accurate visual representation is required. For the exterior image that follows, the AI exterior rendering guide covers facades, glazing, site, and atmosphere. The guide to AI architectural rendering places massing inside the wider Create, Enhance, and Edit workflow.
Sources reviewed
- SketchUp Face Styles, reviewed 8 October 2026
- SketchUp Casting Real-World Shadows, reviewed 8 October 2026
- Rhino 8 Arctic display mode options, reviewed 8 October 2026
- Rhino 8 ViewCaptureToFile command, reviewed 8 October 2026
- CAD Scene Product, Help, prompt guide, and retention method, reviewed 8 October 2026
Questions about massing model rendering
Can CAD Scene open my SketchUp, Rhino, or Revit massing model?
No. Enhance reads an exported image. It does not read the model file, its layers, components, or dimensions. Export one clean view and use that as the source.
Will the render keep my exact building heights?
No exact-retention guarantee applies. The source constrains visible volumes and proportions, but generated details can drift. Model floor lines and compare every height with the model.
Should the context be rendered photoreal too?
Usually not for a massing study. Pale untextured context keeps the proposal as the subject and avoids invented neighbouring facades. Render context fully only when its character is part of the decision.
Can a massing render go straight to a client presentation?
Yes, if it is labeled as a direction. Mark proposed openings and materials as unresolved. Do not present inferred facades as design decisions.
Table of Contents
- What does a massing model tell an AI render?
- Which AI tools can render a photoreal exterior from a massing model?
- How much detail should the massing model carry?
- How do you prepare the white model view?
- What should the Enhance brief say?
- How can one massing test several facade directions?
- What goes wrong when a massing model becomes a render?
- How do you review a massing render?
- Where does a massing render fit in the design process?
- Sources reviewed
Authors

- Name
- Vladimir Mindru
Previous Article
Table of Contents
- What does a massing model tell an AI render?
- Which AI tools can render a photoreal exterior from a massing model?
- How much detail should the massing model carry?
- How do you prepare the white model view?
- What should the Enhance brief say?
- How can one massing test several facade directions?
- What goes wrong when a massing model becomes a render?
- How do you review a massing render?
- Where does a massing render fit in the design process?
- Sources reviewed
Authors
- Name
- Vladimir Mindru