
- Updated on
Residential AI Rendering: A Source-Led Guide for Architects
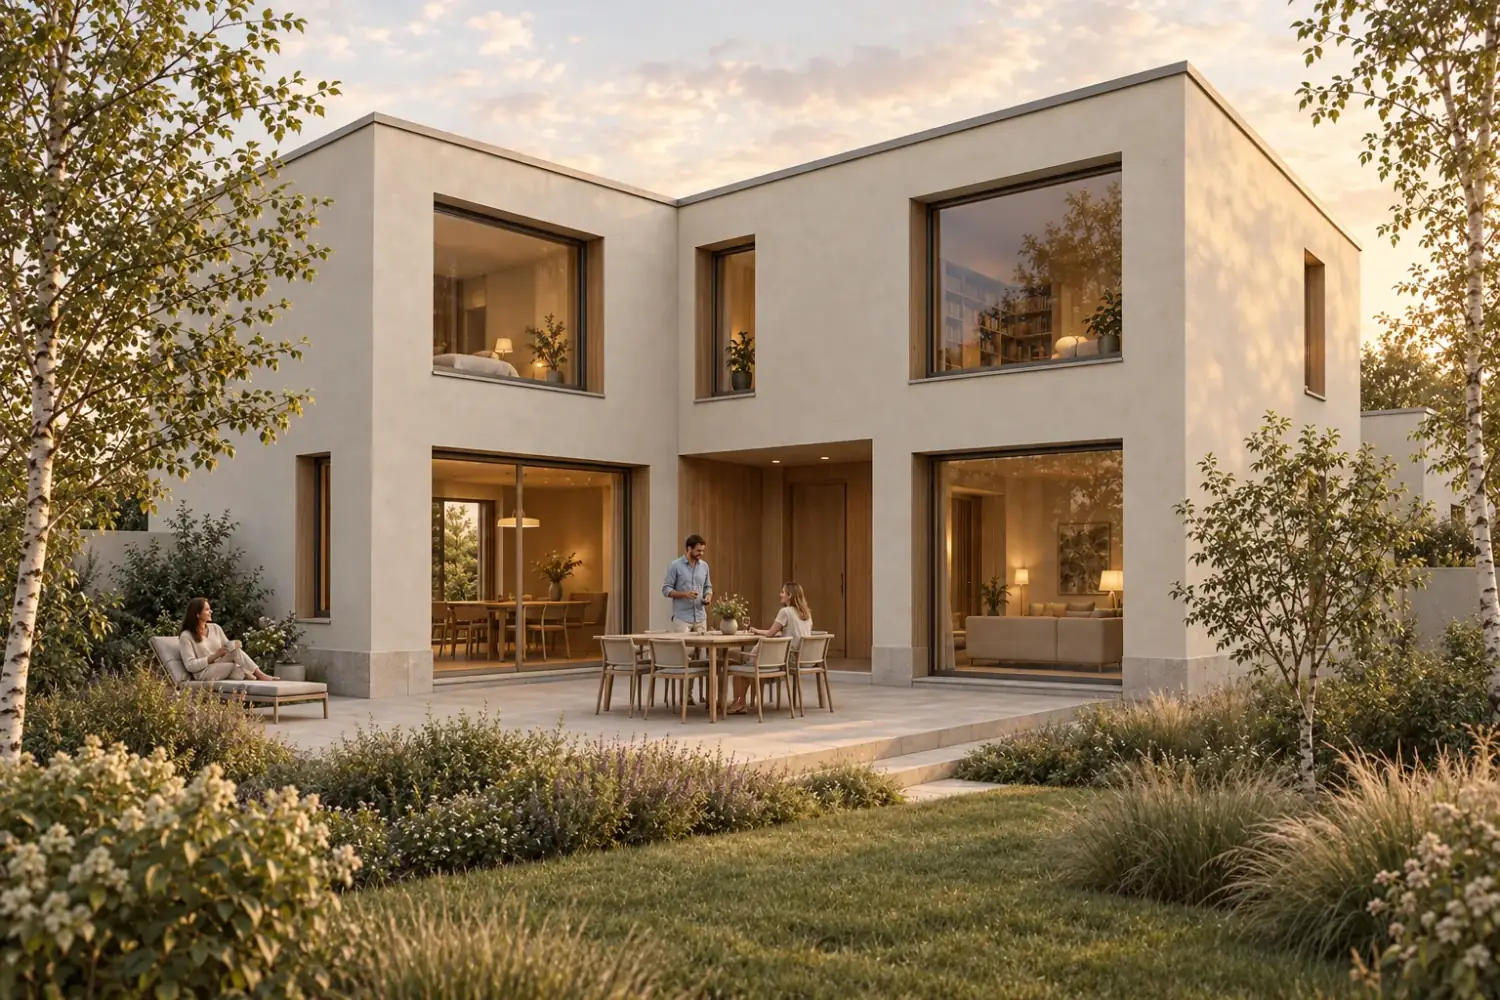
Residential AI rendering turns a house sketch, model view, or room screenshot into an image for design discussion. Start with the decision, not the mood. Choose Create while massing remains open. Use Enhance when a modeled camera and visible design should guide the result. Use Edit when one facade or room element needs correction. Then check rooflines, openings, stairs, glazing, materials, light, and landscape against the project source. The render can support concept options, material studies, and client review. It does not replace the model, drawings, specifications, or measured coordination.
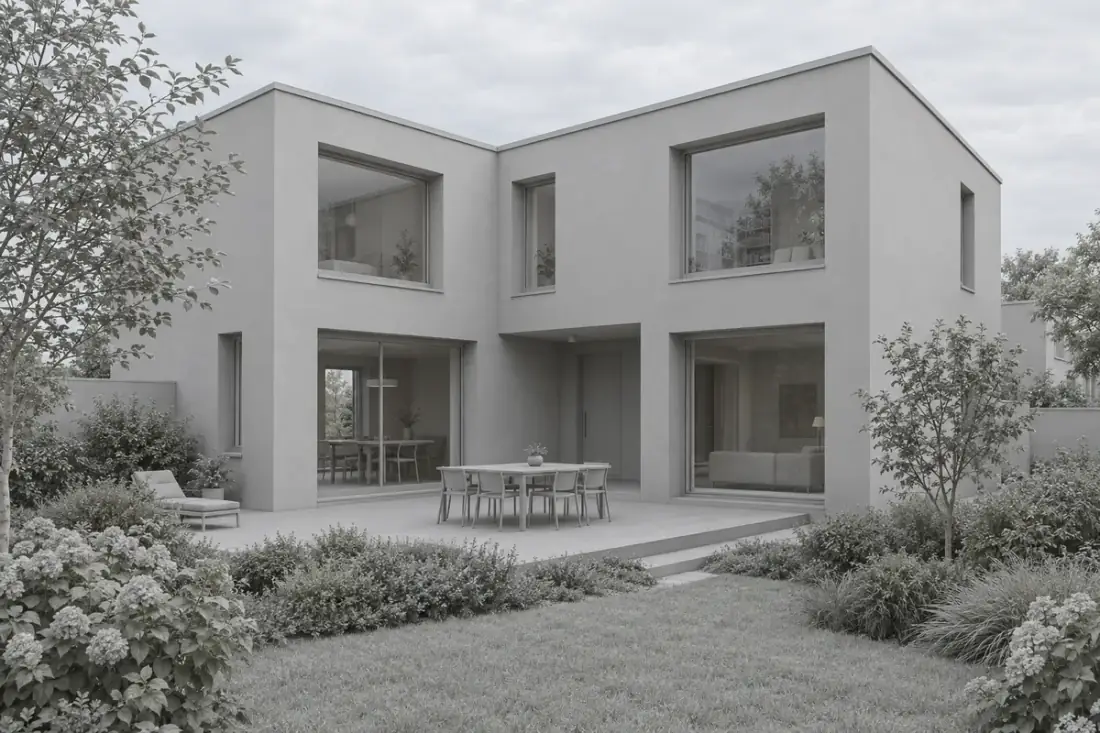 Synthetic source
 Daylight review
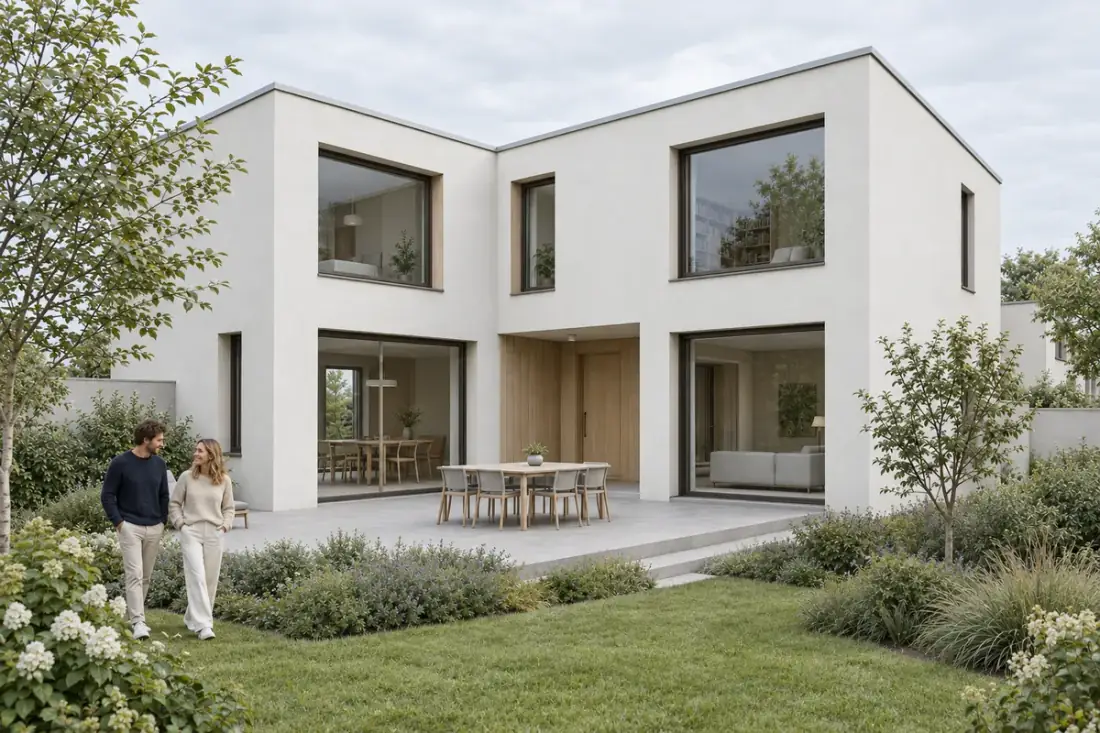
Camera, crop, house, openings, and landscape footprint stay within one synthetic lineage. The images demonstrate a review method, not measured retention.
Use the slider to check the building before the atmosphere. Compare the crop, silhouette, roof, openings, entrance, terrace, and landscape footprint. Then inspect materials, reflections, people, and small artifacts.
What is residential AI rendering?
Residential AI rendering applies image generation to houses, apartments, extensions, and residential interiors. The input can be text, a sketch, a floor plan image, or a 3D model screenshot.
The right input depends on the design stage. Text can open a broad concept. A sketch can hold a rough composition. A model view supplies the clearest visible constraint. The broader AI architectural rendering guide explains those starting points.
A residential image has a practical job. It might compare facade finishes, explain a garden threshold, test a living room palette, or establish a client presentation direction. Name that job before writing the brief.
When should architects use AI rendering for a house?
Use AI rendering when an image can clarify the next design conversation. The useful stage depends on how much of the project is resolved.
| Stage | Useful residential task | Source to trust |
|---|---|---|
| Early concept | Explore massing, atmosphere, and broad material direction | Brief, site constraints, and current sketch |
| Developed model | Study facade, glazing, landscape, and room character | Current model view, plans, and elevations |
| Client review | Explain one option or compare a controlled set | Reviewed project source and decision record |
| Technical coordination | Illustrate intent without treating the image as evidence | Model, drawings, schedules, and specifications |
Create suits an unresolved idea. Enhance suits a framed SketchUp, Revit, Rhino, Blender, or other model view. Edit suits a bounded correction after the first image. These are three modes in one project, not promises of exact geometry.
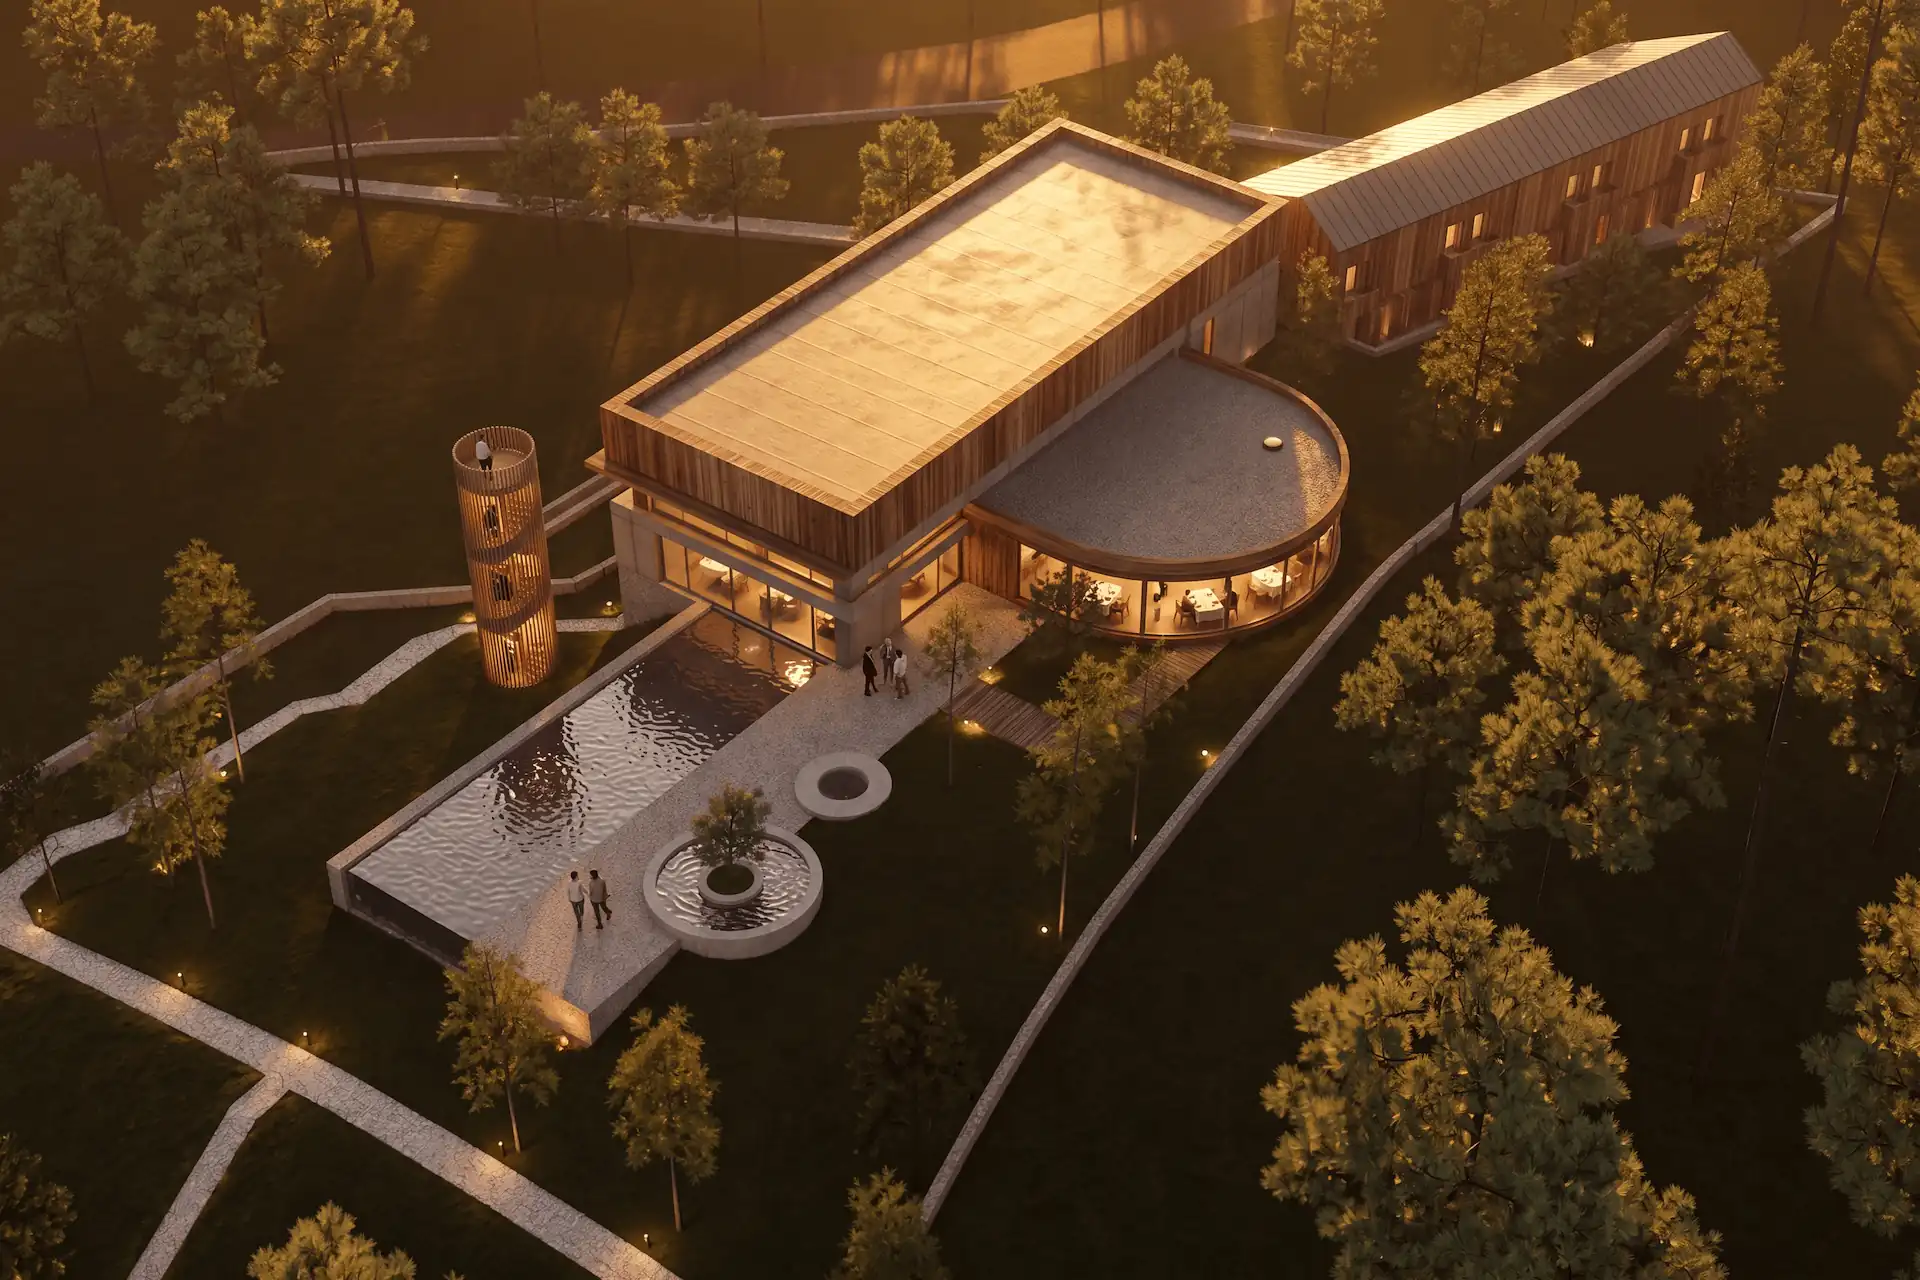
Before / after
Test one residential direction on your own scene.
What makes a residential render credible?
A credible house render makes the design readable before it makes the scene atmospheric. Check the large decisions first.
Do the roofline and openings hold?
Compare the silhouette, roof edges, floor lines, entrances, and window openings with the model. Repeated windows expose drift quickly. So do balcony edges, railings, eaves, and stairs.
Glazing needs depth and plausible reflections. Black panes look empty. Clear panes can reveal invented interiors. Keep mullions and opening proportions under review.
Does the house meet the ground?
Terraces, steps, plinths, paving, and planting should connect the building to the site. A blurred base can make a solid house appear to float.
Use planting to explain climate, privacy, and season. Keep it clear of important openings. Cars and people can show scale, but they should not conceal weak architecture. The render entourage guide covers placement, density, and review.
Do rooms support believable living patterns?
Check furniture scale, circulation, doors, kitchen clearances, and stair landings. A polished room can still contain an impossible chair or blocked route. Keep plans and schedules beside the image.
For room-specific choices, use the interior rendering with AI guide. It separates broad visual direction from live, measured, or product-specific work.
How does the workflow change by residential project type?
The source and review risk change with the project. A new house, apartment, and extension should not use the same image brief.
New house
Start with massing, roof, openings, entrance, and site contact. The first useful pair is often a three-quarter exterior plus one garden threshold. Keep planting low enough to inspect the architecture.
Renovation or extension
State what is existing, retained, removed, and proposed. Use one color-neutral source where old and new work can be compared. Do not let a generated image quietly replace neighboring windows, roof edges, boundary walls, or mature planting.
Keep a marked plan or elevation beside the render. The image can explain intent. It cannot verify existing conditions.
Apartment or residential interior
Lead with the main social space. Show one exit, the kitchen working area, and the principal garden, balcony, or window threshold. Check furniture scale and circulation against the plan.
Avoid the wide-angle showroom effect. A dramatic lens can make a small room appear generous while concealing a blocked route.
Privacy and overlooking
Privacy depends on real sightlines, levels, boundaries, and occupation. Use the render to discuss screening and atmosphere. Use the model, section, and survey to test the actual condition.
How do you prepare a residential model view?
Prepare one clean source for each camera. Set the crop and horizon before generation. Hide selections, guides, axes, grids, section boxes, and interface controls.
Keep useful geometry visible. Roof edges, frames, stairs, joinery, and terrace levels help the image model read the design. Heavy sketch edges can become false trim. Placeholder people and trees can become unintended final elements.
Tool-specific checks differ:
- Save a stable camera before you render a SketchUp house screenshot.
- Hide BIM annotations before a Revit residential view becomes an AI render.
- Use a named view for Rhino house and facade rendering with AI.
- Lock the camera before a Blender residential screenshot render.
The cross-tool screenshot capture guide covers framing, overlays, edges, and export size. It also explains why one source per camera is safer than one source for several views.
Return to the opening comparison after export. If an important edge cannot be checked there, choose a clearer source before refining atmosphere.
What residential rendering workflow should you follow?
Work from one review question to one checked image. Avoid changing camera, materials, weather, and occupation in the same comparison.
Name the decision
Choose massing, facade, interior mood, landscape, light, or presentation as the main question.Choose one source view
Frame the camera around the decision and keep every important edge visible.Clean the source
Hide interface noise, selections, grids, guides, and misleading placeholder objects.Write the visual direction
Name materials, light, landscape, occupation, and the design elements that should remain.Generate a focused study
Change one main decision at a time so related images remain useful to compare.Review against the project
Check camera, proportions, openings, stairs, materials, site contact, entourage, and artifacts.
Keep the accepted source, brief, output, and review note together. That record helps the next study follow the same visual direction.
Plan the next residential image
Choose the project stage and decision. The view, source direction, review checks, and copyable brief update together.
Massing and facadeLead with a three-quarter exterior
Explain the house, entrance, openings, and site contact together.
Pair with one facade or threshold detail.
Check before sharing
- Silhouette, roof edges, and repeated openings match the source
- Steps, plinth, terrace, and planting meet the building cleanly
- Compare the result with the current project source.
Copyable residential brief
Purpose: Explain the house, entrance, openings, and site contact together. Mode: Use Enhance with one clean source image for each camera. Source: current model view, plans, elevations, and material direction. View: fixed eye-level three-quarter garden or street camera. Use neutral daylight, readable glazing, restrained planting, and secondary residents. Preserve: Keep the roof, floor lines, openings, entrance, terrace, and landscape footprint visible. Finish: clear daylight finish that keeps important edges inspectable. Review boundary: Compare the result with the current project source.
The planner chooses one image job and one review boundary. It does not decide whether the design passes. Use its brief as a starting point, then replace every generic surface or assumption with project-specific information.
What should a residential render brief say?
A useful brief names purpose, source, view, materials, light, occupation, and what should remain. Put lasting visual direction in the project's Composition. Keep the current image instruction focused on one result.
Source-led exterior brief
Copy the full brief, then adjust one variable at a time.
Prompt
Use the attached model view as the source. Keep its camera, crop, roof form, floor lines, window and door openings, entrance, terrace, and landscape footprint. Produce a clear daylight residential review image. Use pale mineral render, vertical oak cladding, dark bronze frames, honed stone at the base, restrained glazing reflections, low native planting, and two secondary residents clear of the facade. Do not add floors, openings, balconies, paths, cars, or boundary structures. The model and drawings remain authoritative.
Source-led living and kitchen brief
Copy the full brief, then adjust one variable at a time.
Prompt
Use the attached living and kitchen view as the source. Keep its eye-level camera, crop, ceiling, window and door openings, stair, kitchen layout, island, dining table, sofa footprint, and circulation. Use pale oak, warm mineral plaster, honed light stone, linen upholstery, dark bronze frames, and soft Nordic daylight. Keep the garden threshold readable. Do not add pendants, furniture, doors, steps, artwork, or decorative objects. Compare the result with the plan and model before client review.
The preservation list should contain only visible, important elements. Long lists of hidden project facts do not make an image more accurate. Use the architecture render prompt guide for scene, material, light, camera, and constraint structure.
Which residential views should you render first?
Start with a small set that explains the project. More images do not create more clarity by themselves.
- Three-quarter exterior. Show massing, entry, glazing, and site contact.
- Garden or threshold view. Explain inside-to-outside use and privacy.
- Living and kitchen view. Show the main social space and circulation.
- Material study. Isolate one facade or interior finish decision.
- Dusk view. Use it only when occupation or lighting matters.
A facade-led project may replace the interior with a street elevation or detail. An apartment project may lead with the social room instead. The decision should set the sequence.
These five independent editorial examples show distinct image jobs. They are not one project, one model, or one camera set.
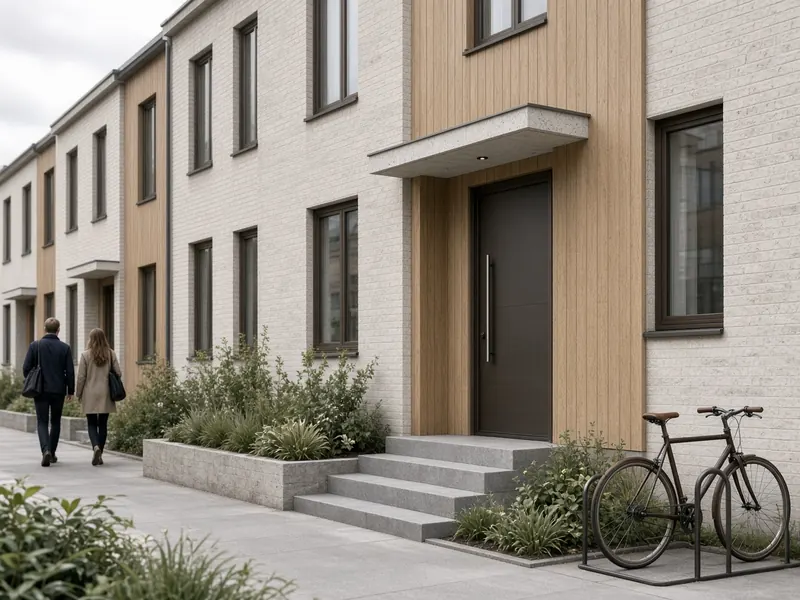
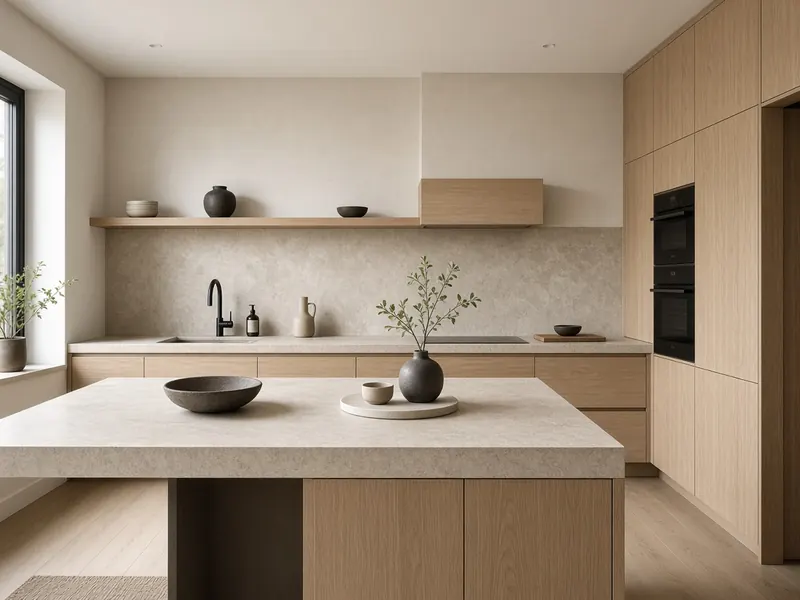
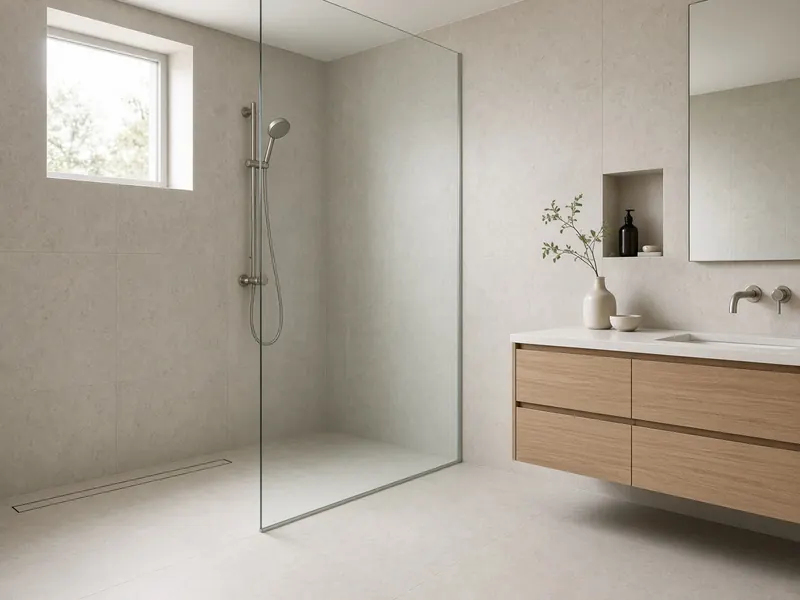
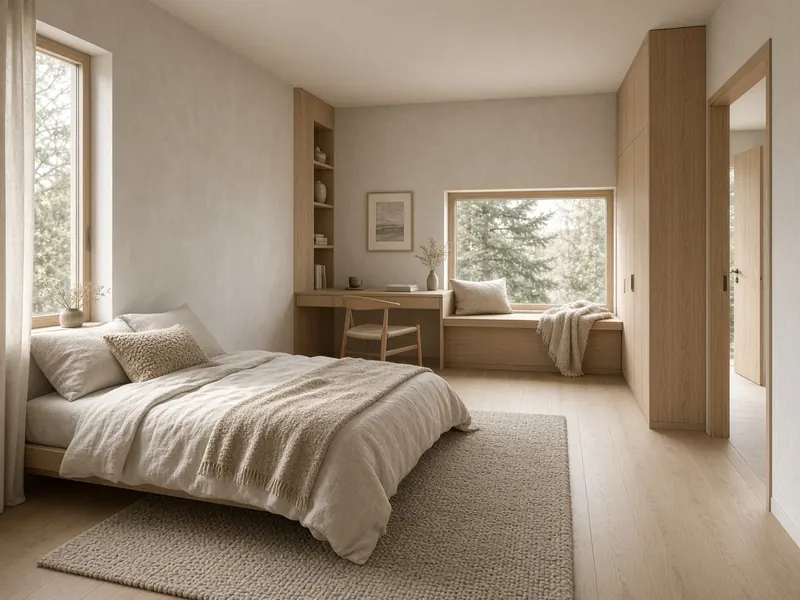
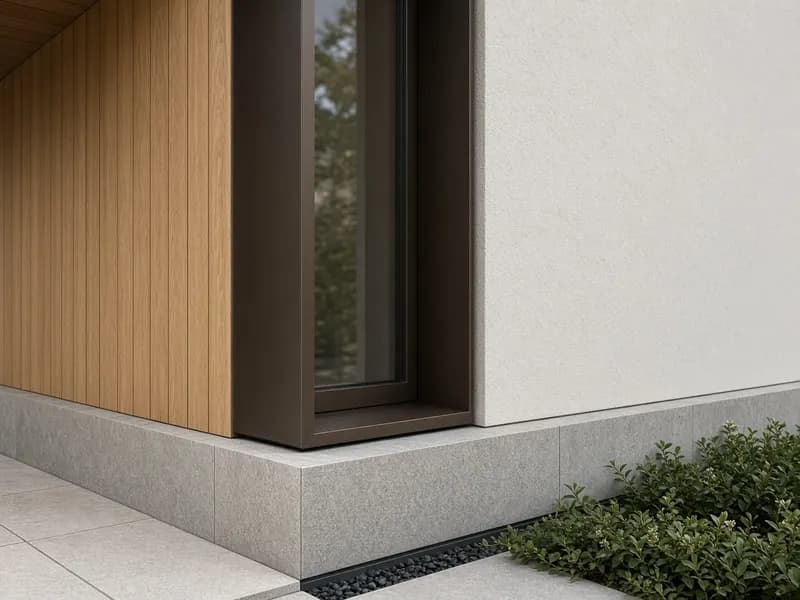
For client work, the render review checklist uses pass, correct, or defer outcomes. It keeps an attractive image from bypassing a design check.
How should materials and light change across a study?
Hold the building and camera while changing one visual variable. This makes the comparison easier to discuss.
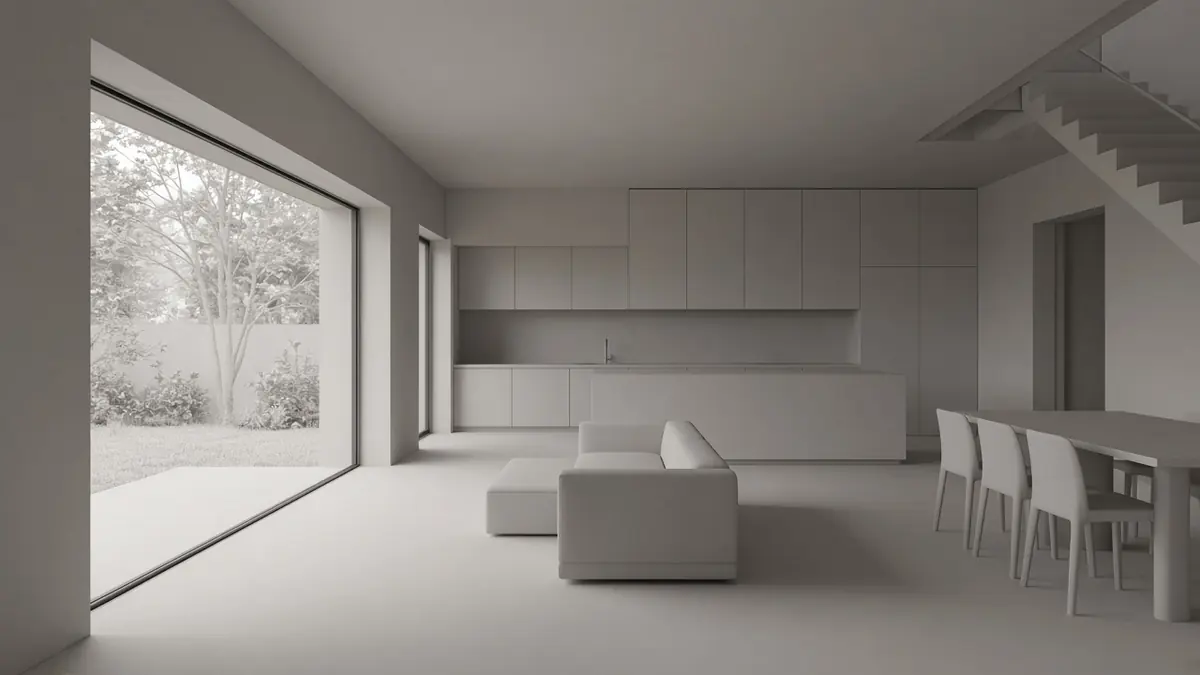 Synthetic source
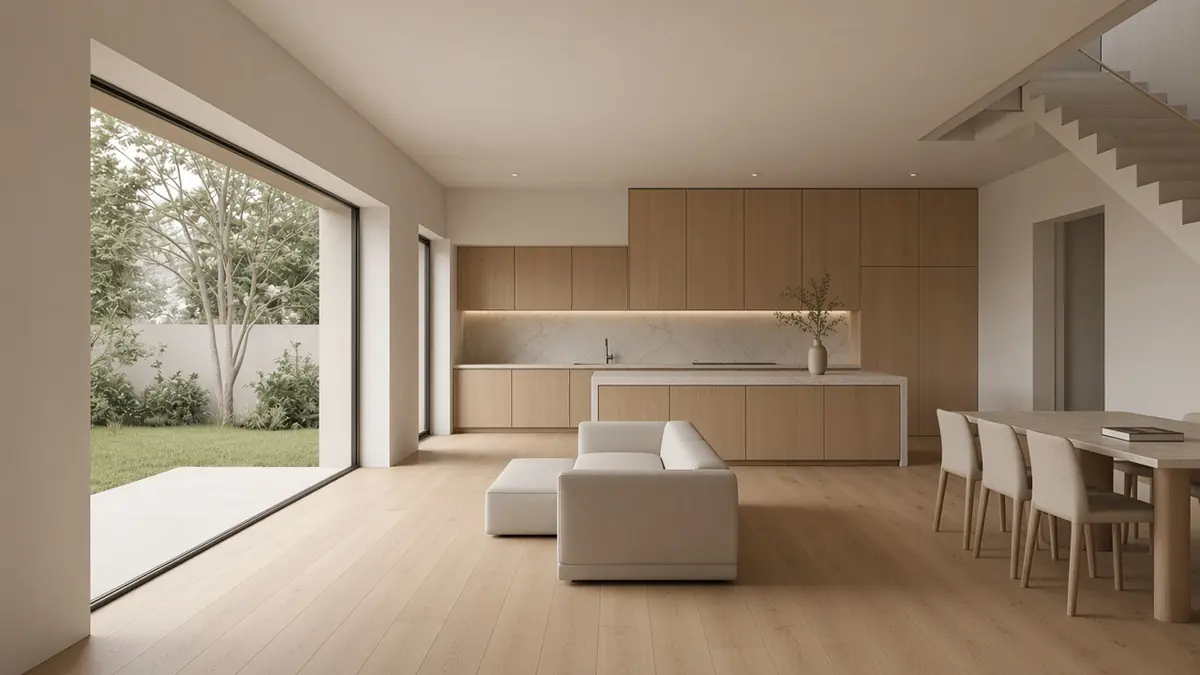 Daylight review
One interior source supports daylight, material, and evening drafts. Review each change against the source before accepting it.
The daylight and material studies keep the main room geometry and camera aligned. The evening draft exposes a useful failure. It adds pendant fixtures that do not exist in the source. A client-ready version should be corrected or regenerated, even though its light is convincing.
Use daylight to judge material tone and junctions. Use dusk to discuss occupation and lighting. Do not use one dramatic image to approve both. The architectural rendering styles guide helps separate technique from design language.
What should make you reject or defer an image?
Reject an image when it changes the decision under review. Correct it when one bounded issue can be revised. Defer it when the source is not resolved enough to judge.
| Outcome | Use it when | Residential example |
|---|---|---|
| Pass | The image answers one decision and survives source comparison | Facade material changes while roof, openings, terrace, and camera hold |
| Correct | One visible issue can be isolated without changing the design question | A glazing reflection is wrong but the opening and frame remain correct |
| Reject | The image alters architecture or introduces a new design | A floor, window, pendant, stair, boundary wall, or path appears |
| Defer | The project source cannot yet support the judgment | Privacy, access, structure, or product selection remains unresolved |
Run the residential image review
Check the decision and source before judging polish or atmosphere.
0 of 6 checks complete
Record the handoff
Complete the checks, select an outcome, and identify the reviewed source before copying the record.
Source revision: Not recorded
Decision: Residential image review
Unresolved items: None recorded
Reviewer: Not recorded
Date: Not recorded
Outcome: Not selected
The final state is an architect handoff, not automatic approval. Record the source revision, decision, unresolved items, reviewer, date, and outcome. The client-review rubric provides the wider pass, correct, or defer process.
What are the limits of residential AI rendering?
AI rendering produces an image. It does not inspect the model or coordinate the project. It cannot confirm code, structure, waterproofing, energy performance, accessibility, or product availability.
Generated details can appear plausible without matching the design. Check stairs, rails, handles, fixtures, roof drainage, and repeated windows. Verify material samples and manufacturer data outside the image.
Use a conventional rendering workflow when exact assets, measured sun, animation, or repeatable technical control govern the deliverable. Use AI images for visual studies whose limits are understood and reviewed.
What is the evidence basis for this guide?
This article was reviewed on 13 September 2026 against CAD Scene's current Enhance source-image contract, Edit review guidance, and published render-retention method.
The fourteen article images are synthetic editorial examples. Nine form two matched lineages. Five are labeled independent views. They test whether the review method is understandable. They do not report a controlled product benchmark, measured geometry score, client outcome, or construction result.
That boundary matters. A matched image can teach comparison without proving retention. The source model, drawings, specifications, schedules, surveys, and consultant information remain the evidence for the project.
Questions about residential AI rendering
What is residential AI rendering?
It is image generation for houses, apartments, extensions, and residential interiors. Inputs can include text, sketches, plans, or clean model screenshots.
Can an AI render keep my house model camera?
A clean model screenshot constrains the visible camera and design. Generated details can still drift, so compare every important output with the model.
Which residential views should I render first?
Start with a three-quarter exterior, the main social interior, and one material or threshold study. Add a dusk view only when lighting or occupation matters.
How should I render a residential extension?
State what is existing, retained, removed, and proposed. Keep a marked plan or elevation beside the image, and reject any output that quietly changes neighboring openings, roofs, boundaries, or planting.
Can I use residential AI renders for client review?
Yes, for concept options and presentation discussions. Label their purpose, review them against the project source, and keep technical information authoritative.
Table of Contents
- What is residential AI rendering?
- When should architects use AI rendering for a house?
- What makes a residential render credible?
- How does the workflow change by residential project type?
- How do you prepare a residential model view?
- What residential rendering workflow should you follow?
- What should a residential render brief say?
- Which residential views should you render first?
- How should materials and light change across a study?
- What should make you reject or defer an image?
- What are the limits of residential AI rendering?
- What is the evidence basis for this guide?
Authors

- Name
- Vladimir Mindru
Previous Article
Table of Contents
- What is residential AI rendering?
- When should architects use AI rendering for a house?
- What makes a residential render credible?
- How does the workflow change by residential project type?
- How do you prepare a residential model view?
- What residential rendering workflow should you follow?
- What should a residential render brief say?
- Which residential views should you render first?
- How should materials and light change across a study?
- What should make you reject or defer an image?
- What are the limits of residential AI rendering?
- What is the evidence basis for this guide?
Authors
- Name
- Vladimir Mindru